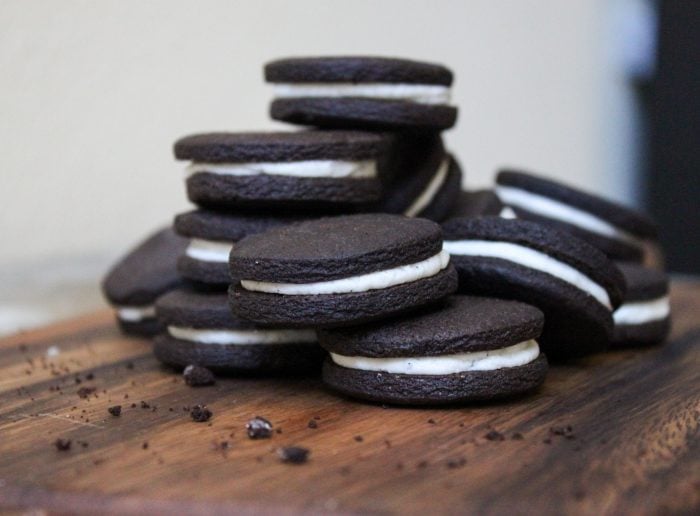
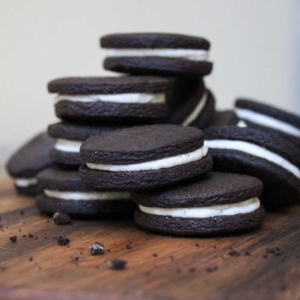
Easy Homemade Oreos! Make your own chocolate cookies with vanilla cream filling.
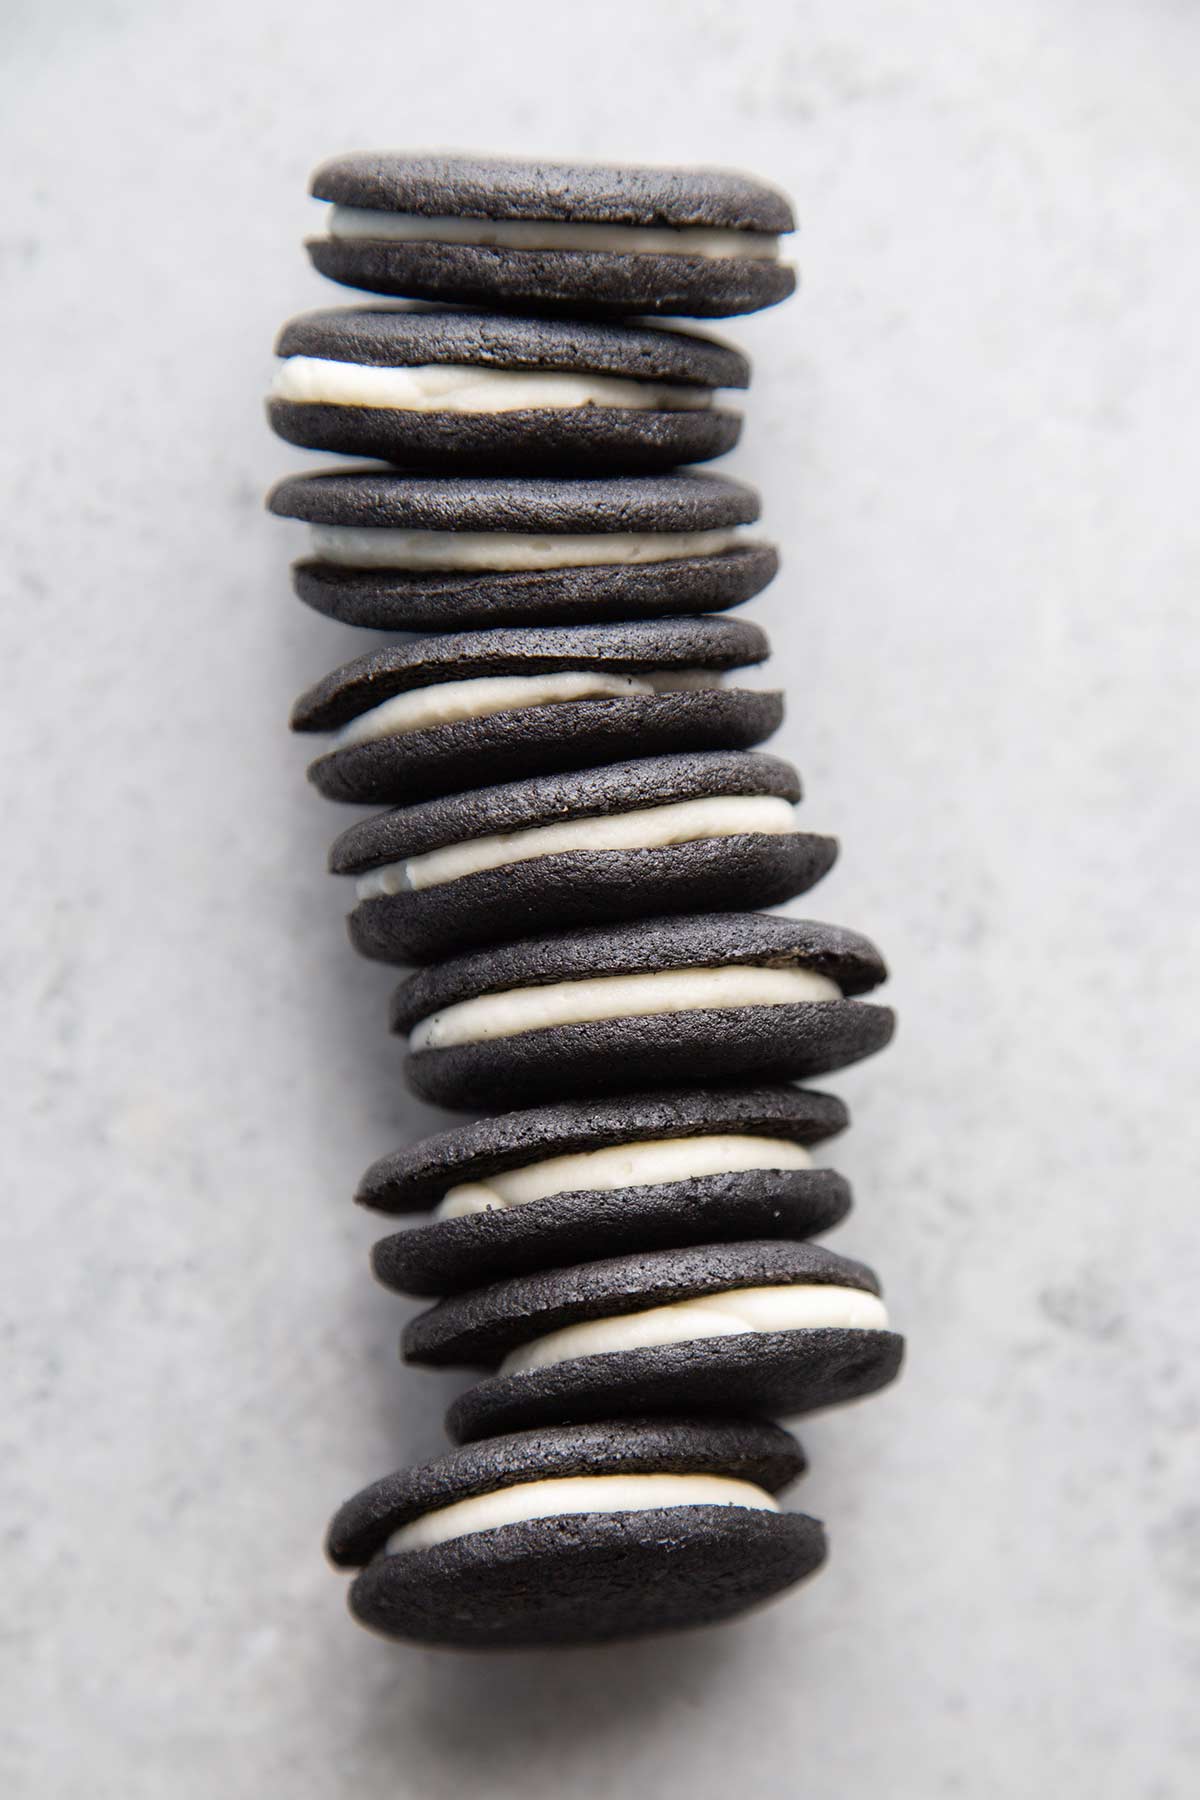
Forget everything you thought you knew about sandwich cookies. These homemade Oreos prove that the best version of America’s favorite cookie comes from your own kitchen—not a blue package.
This recipe delivers exactly what you want: deep chocolate flavor, satisfying snap, and that signature cream filling you remember from childhood. The difference? You know every ingredient going into these cookies, and you can actually pronounce all of them.

The chocolate wafers bake up perfectly crisp with just the right amount of cocoa intensity, while the vanilla cream filling strikes that ideal balance between sweet and rich.
And here’s the best part—you control the filling ratio. Want double-stuffed? Triple-stuffed? Ridiculously mega-stuffed? It’s your call.
Why Make Oreos from Scratch?
Beyond the obvious bragging rights, homemade versions use real butter, actual vanilla, and quality cocoa powder. No hydrogenated oils, no mystery preservatives, no ingredients that require a chemistry degree to understand.
The taste difference is remarkable—richer chocolate flavor, cleaner vanilla notes, and a more satisfying texture overall.
These also make an impressive project for weekend baking or a fun activity with kids who are old enough to help measure and mix.
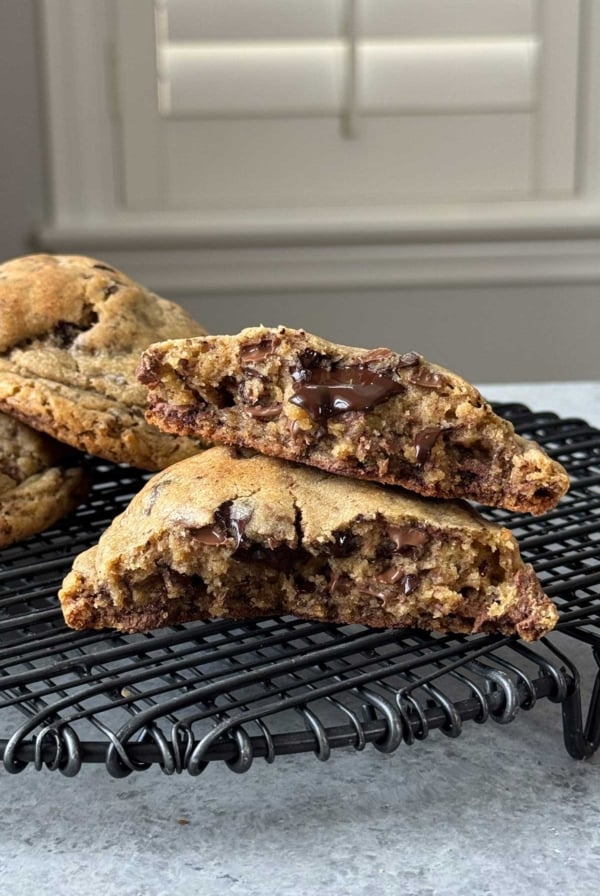
The Secret to Perfect Chocolate Wafer Cookies
Most copycat Oreo cookie recipes fail because they’re either too cakey or too hard. This formula uses refined coconut oil in the dough, which creates that characteristic crisp-yet-tender texture you expect from a proper sandwich cookie.
Use your choice of refined coconut oil or shortening in the dough. These are both 100% fat with no water content (unlike butter which is about 80% fat and 20% water). This high fat content helps to create that crispy, crumbly wafer cookie bite.
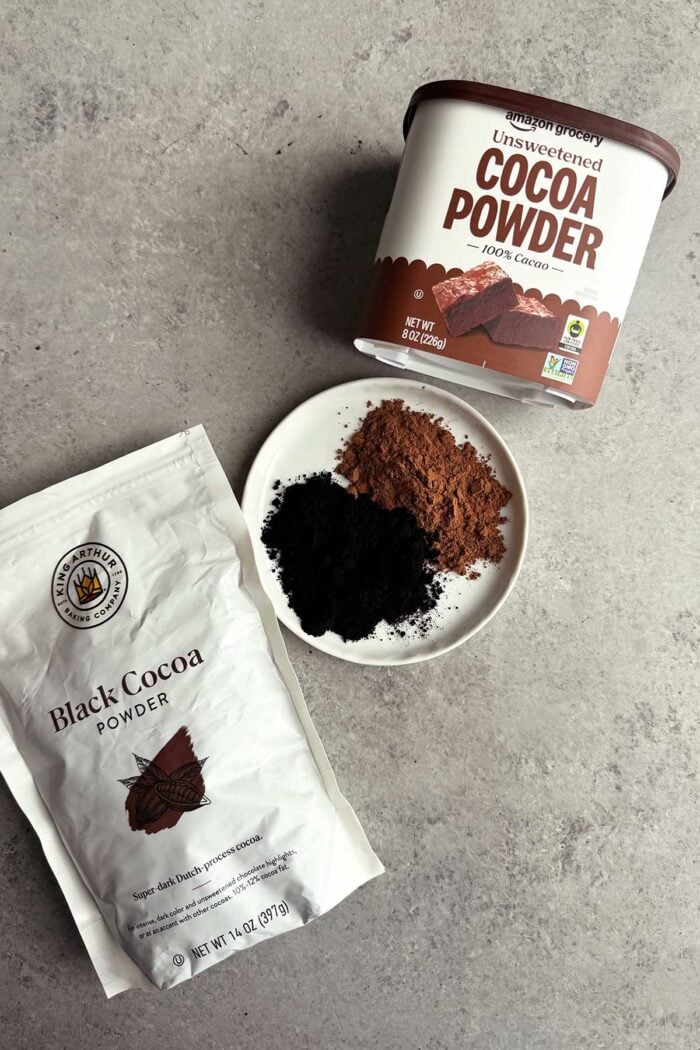
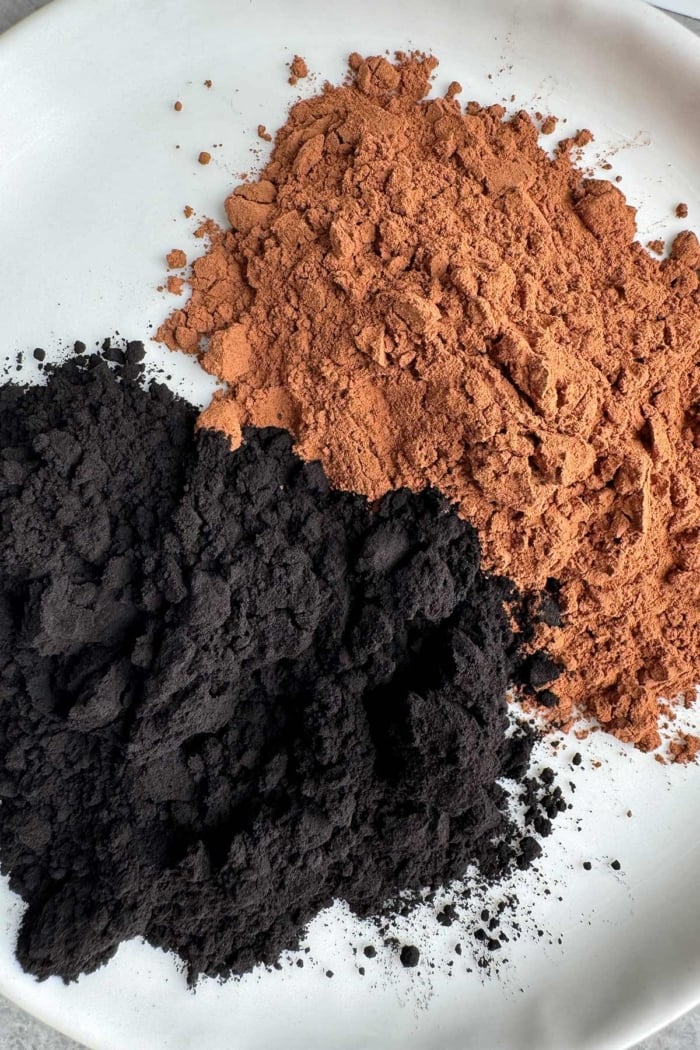
To achieve that iconic dark Oreo cookie color, it is important to use the right cocoa powder! Use a quality dark cocoa powder here—it makes all the difference. Dutch-processed works beautifully and gives you that signature deep brown color. Regular natural cocoa will work too, but the flavor won’t be quite as intense.
As you can see in the images above, the difference between black cocoa (dark cocoa) versus standard unsweetened cocoa powder is striking. I highly recommend using this black cocoa powder or this double dark cocoa blend.
Vanilla Cream Filling
The filling combines butter and coconut oil for stability and spreadability. This isn’t your typical American buttercream—it’s specifically formulated to hold up at room temperature without melting or getting greasy.
I use vanilla bean paste instead of extract because it delivers more complex vanilla flavor and adds those appealing speckles throughout the cream. If you don’t have it, vanilla extract works fine—just use the best quality you can find.
Filling Flavor Variations
Experimenting with fun, delicious fillings is the best part about making homemade Oreos! Once you’ve nailed the classic vanilla version, it’s time to be adventurous.
Look for flavors with enough spunk to stand up against the rich chocolate wafer cookie- think bold, creamy, or tangy. Here are some options to get you started:
- Ube Halaya Vanilla Bean (inspired by Jack in the Box’s Witch Please shake)
- Brown Butter Cream Cheese
- Black Sesame
- Buko Pandan (or coconut)
- Peanut Butter
Assembly Tips
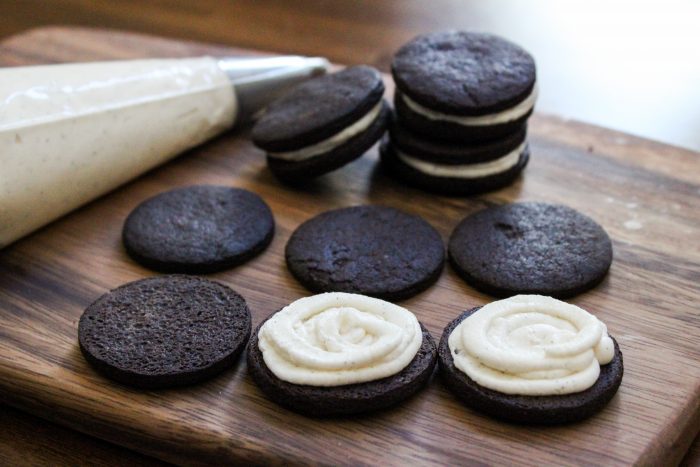
Use a 1¾-inch round cutter for classic-sized cookies. The dough scraps can be gathered and re-rolled once without getting tough. Pipe the filling using a pastry bag for uniform cookies, or simply spread it with a small offset spatula for a more rustic approach.
How much filling? That’s entirely up to you. The recipe makes enough for standard-stuffed cookies, but you can easily adjust to your preference. Just make more filling if you want them extra thick.
Make It a Cookie Variety Box
Use half the dough for Oreos and the other half for homemade Thin Mints—same base recipe, different treatment. It’s an efficient way to create an impressive homemade cookie assortment with minimal effort.
Yes, these take more effort than twisting open a package from the grocery store. But one bite will remind you why homemade always wins. They taste cleaner, richer, and infinitely more satisfying than anything mass-produced.
Plus, you get to decide exactly how much filling goes in the middle—and that alone makes them worth the effort.
Related Oreo Dessert Recipes
Homemade Oreos
Ingredients
Chocolate Cookie:
- 1 ½ cup all-purpose flour, (200 g)
- ½ cup unsweetened dark cocoa powder, (45 g)
- ¾ teaspoon kosher salt
- ½ teaspoon baking powder
- ½ teaspoon baking soda
- ¾ cup granulated sugar, (150 g)
- ½ cup refined coconut oil, (113 g)
- 2 Tablespoon whole milk
- 1 large egg, room temp
- 2 teaspoon vanilla bean paste, or pure vanilla extract
Vanilla Cream Filling:
- ½ cup unsalted butter, (113 g) softened, room temp
- 3 Tablespoon refined coconut oil, (42 g)
- 1 ½ cup confectioners' sugar, (170 g)
- 2 teaspoon vanilla bean paste, or pure vanilla extract
- ¼ teaspoon kosher salt
Instructions
Chocolate Cookie:
- In a medium bowl, whisk together flour, cocoa powder, salt, baking powder, and baking soda. Set aside.
- In the bowl of a stand mixer with a paddle attachment, beat together sugar and coconut oil on medium-high speed. Beat until mixture if fluffy. Reduce speed to low and add milk, egg, and vanilla paste.
- With the mixer still on low, slowly add the prepared flour mixture. Mix until just combined. Divide dough into two equal parts. Flatten the two halves and wrap tightly in plastic wrap. Chill in the refrigerator for 30-45 minutes until dough is cold and firm.
- Preheat oven to 350 degrees. Line baking sheets with parchment paper and set aside.
- Work with one dough at at time. On a lightly floured work surface, roll dough to 1/4”. Using a 1 3/4” round cutter, punch out cookies. Transfer to prepared baking sheet. Space cookies about 1/2” apart from each other. Bake in preheat oven for 15 minutes, rotating sheets halfway through baking. Let cookies cool in the pan for a couple minutes before transferring to a wire rack to cool completely.
Vanilla Cream Filling:
- In the bowl of a stand mixer with a paddle attachment, cream together butter and coconut oil until homogenous.
- Add powdered sugar and beat on medium speed until incorporated. Add vanilla paste and salt. Beat until smooth. Transfer to piping bag or use a small offset spatula to spread onto cooled chocolate cookies. Sandwich cookies together, one plain and one with filling.
Notes
Nutrition
Nutrition information is automatically calculated, so should only be used as an approximation.
 Like this recipe? Rate & comment below!
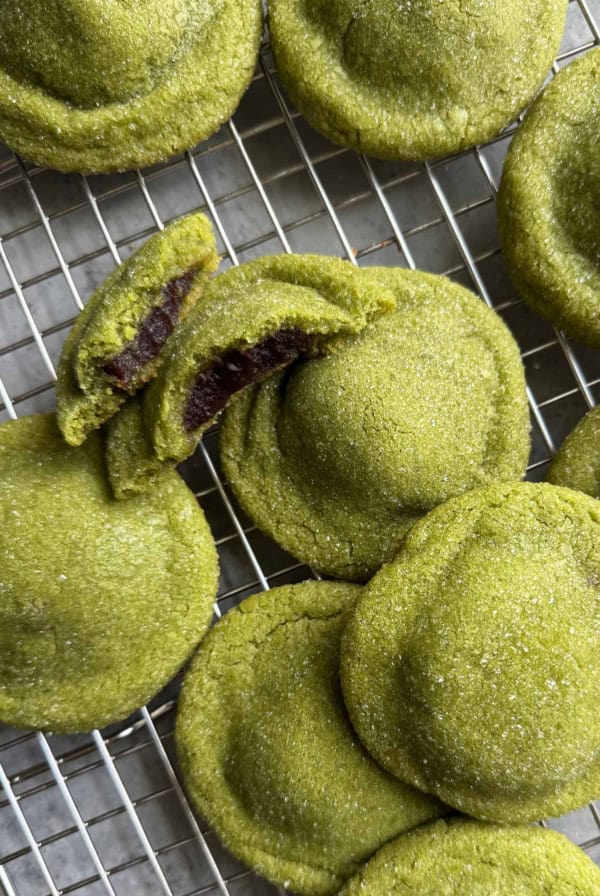


These look fantastic! I’m planning on making these tomorrow. Is it necessary to use dark cocoa powder or would dutch processed suffice?
Dutch processed cocoa powder will work fine.
These turned out PERFECTLY!
That’s wonderful to hear! :)
Amazing recipe! They look delicious!
Can I substitute coconut oil for vegetable oil?
Many thanks in advance! and thanks for sharing! :)
Hello! Where can I get unsweetened dark chocolate cocoa powder in the metro? Thank you :)
Hi Angelica, unsweetened cocoa powder is widely available at supermarkets and grocery stores.
Amazing post!!! I can’t wait to impress everyone in my household with these! They look so delicious (maybe even better than the real thing!!) :)