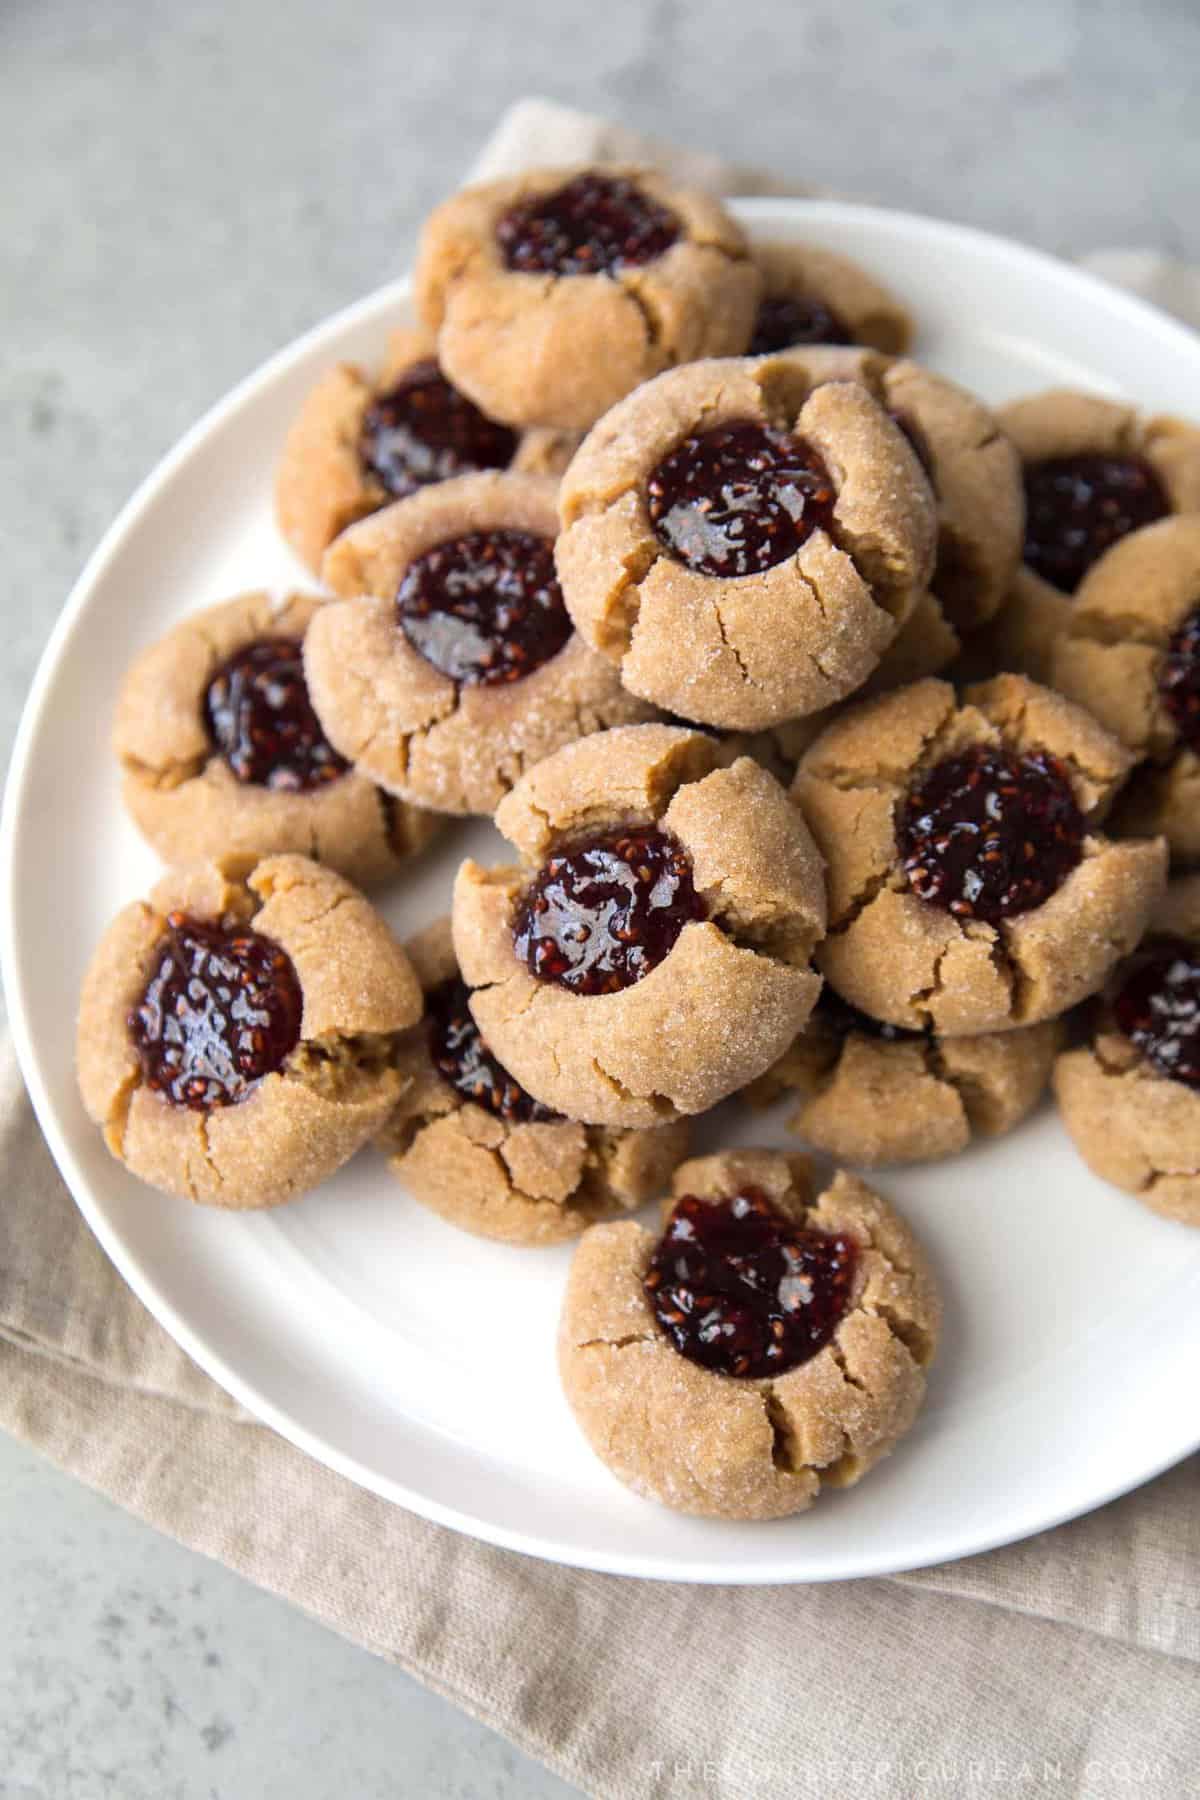
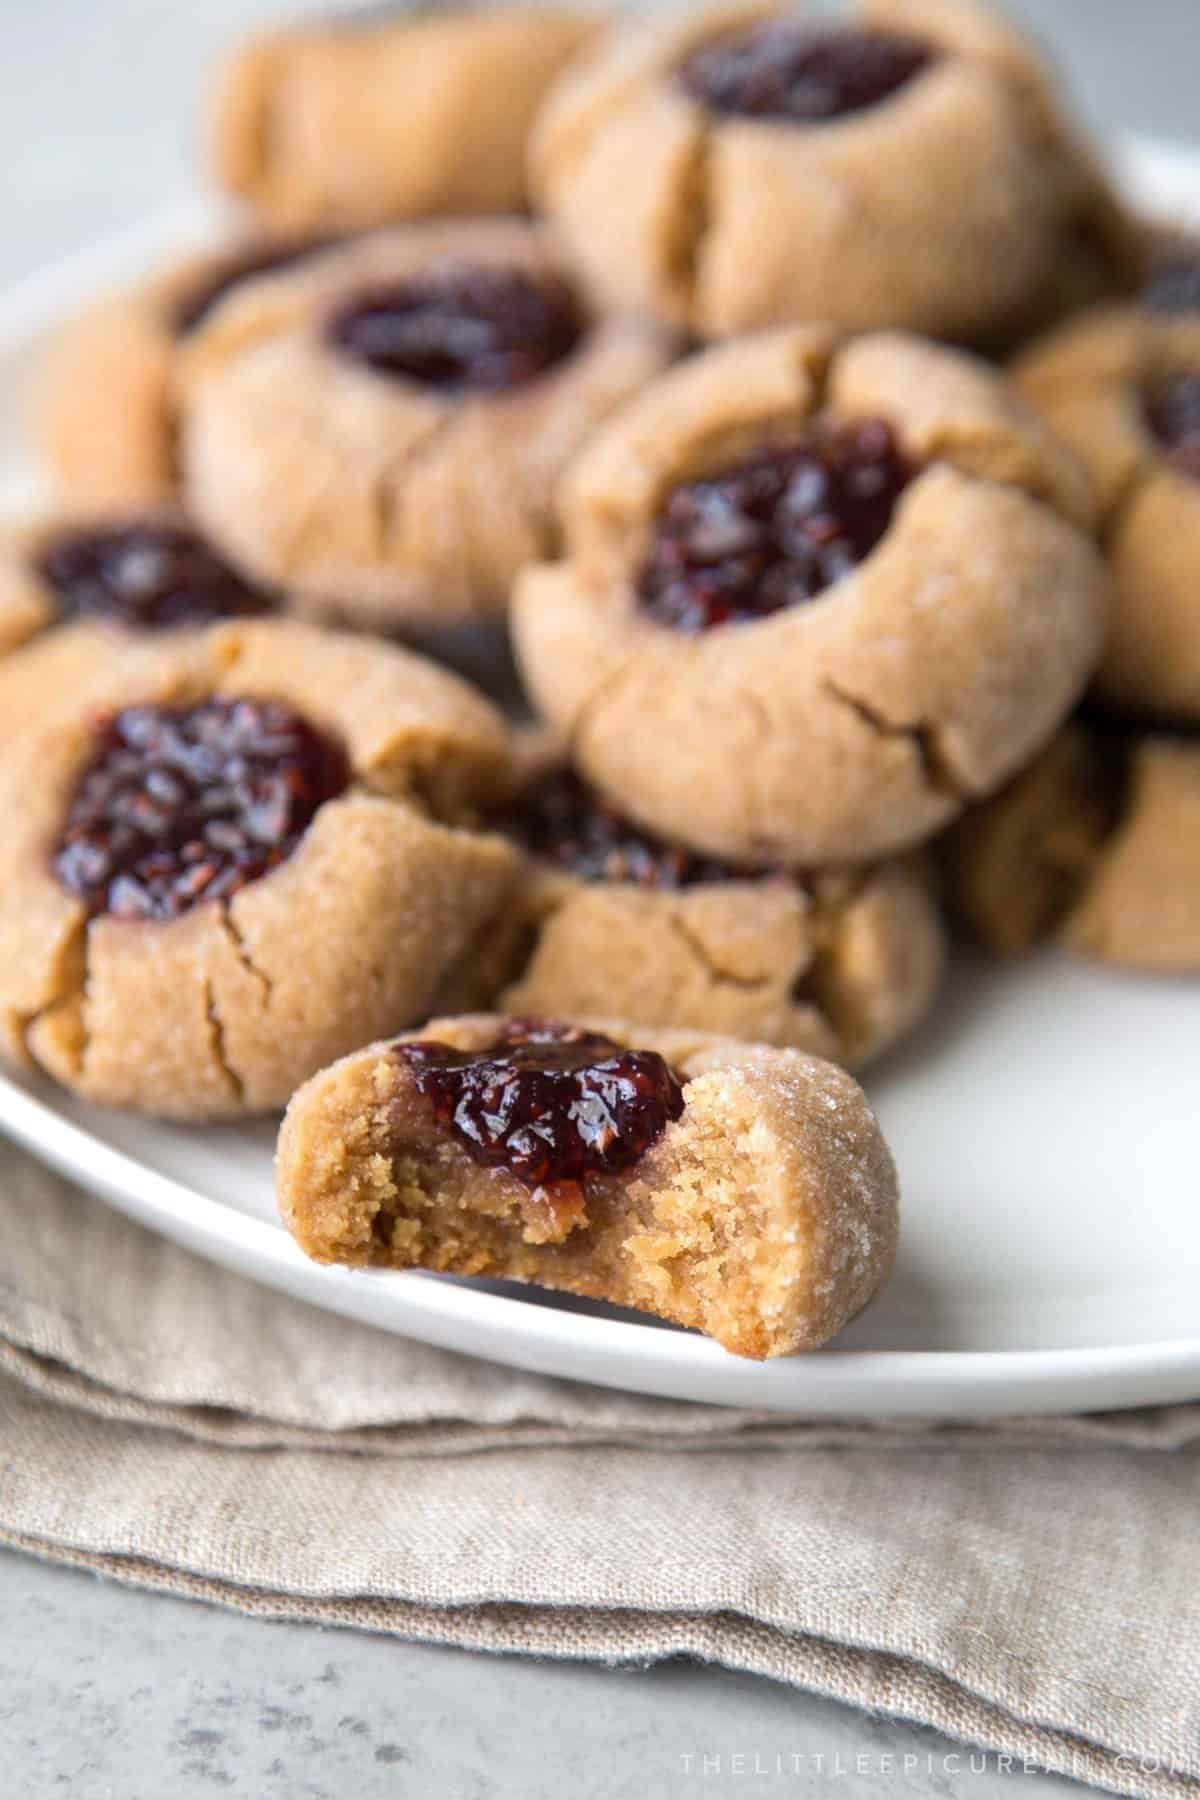
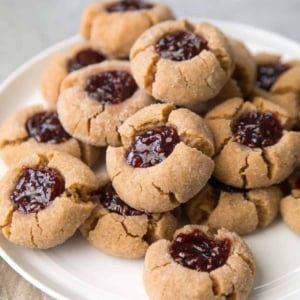
Soft and chewy peanut butter thumbprint cookies filled with raspberry jam.
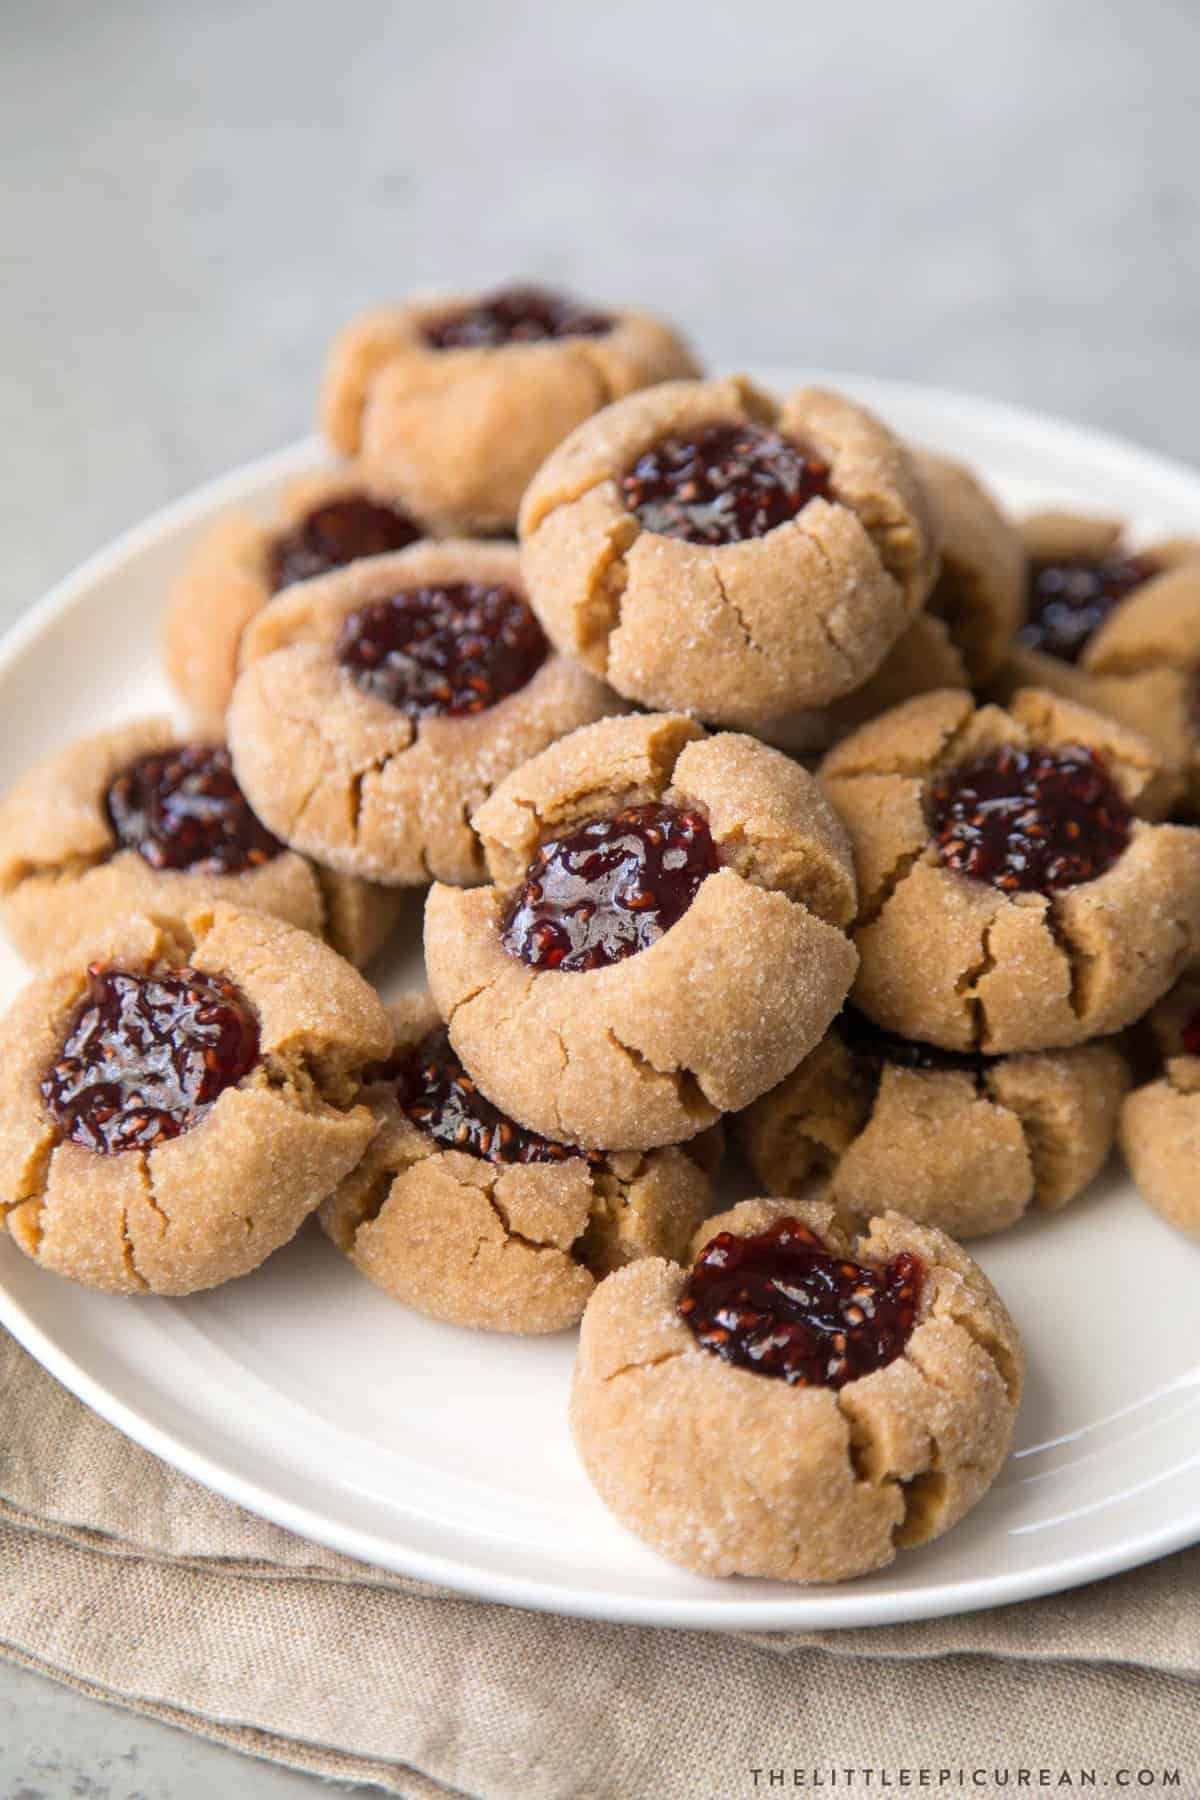
If you grew up on peanut butter and jelly sandwiches, these cookies are about to become your new obsession.
I’ve made countless thumbprint cookies over the years, but this peanut butter version holds a special place in my heart. They capture everything magical about a PB&J sandwich—the nutty richness, the fruity sweetness, the perfect balance—all in one tender, sugar-crusted bite.
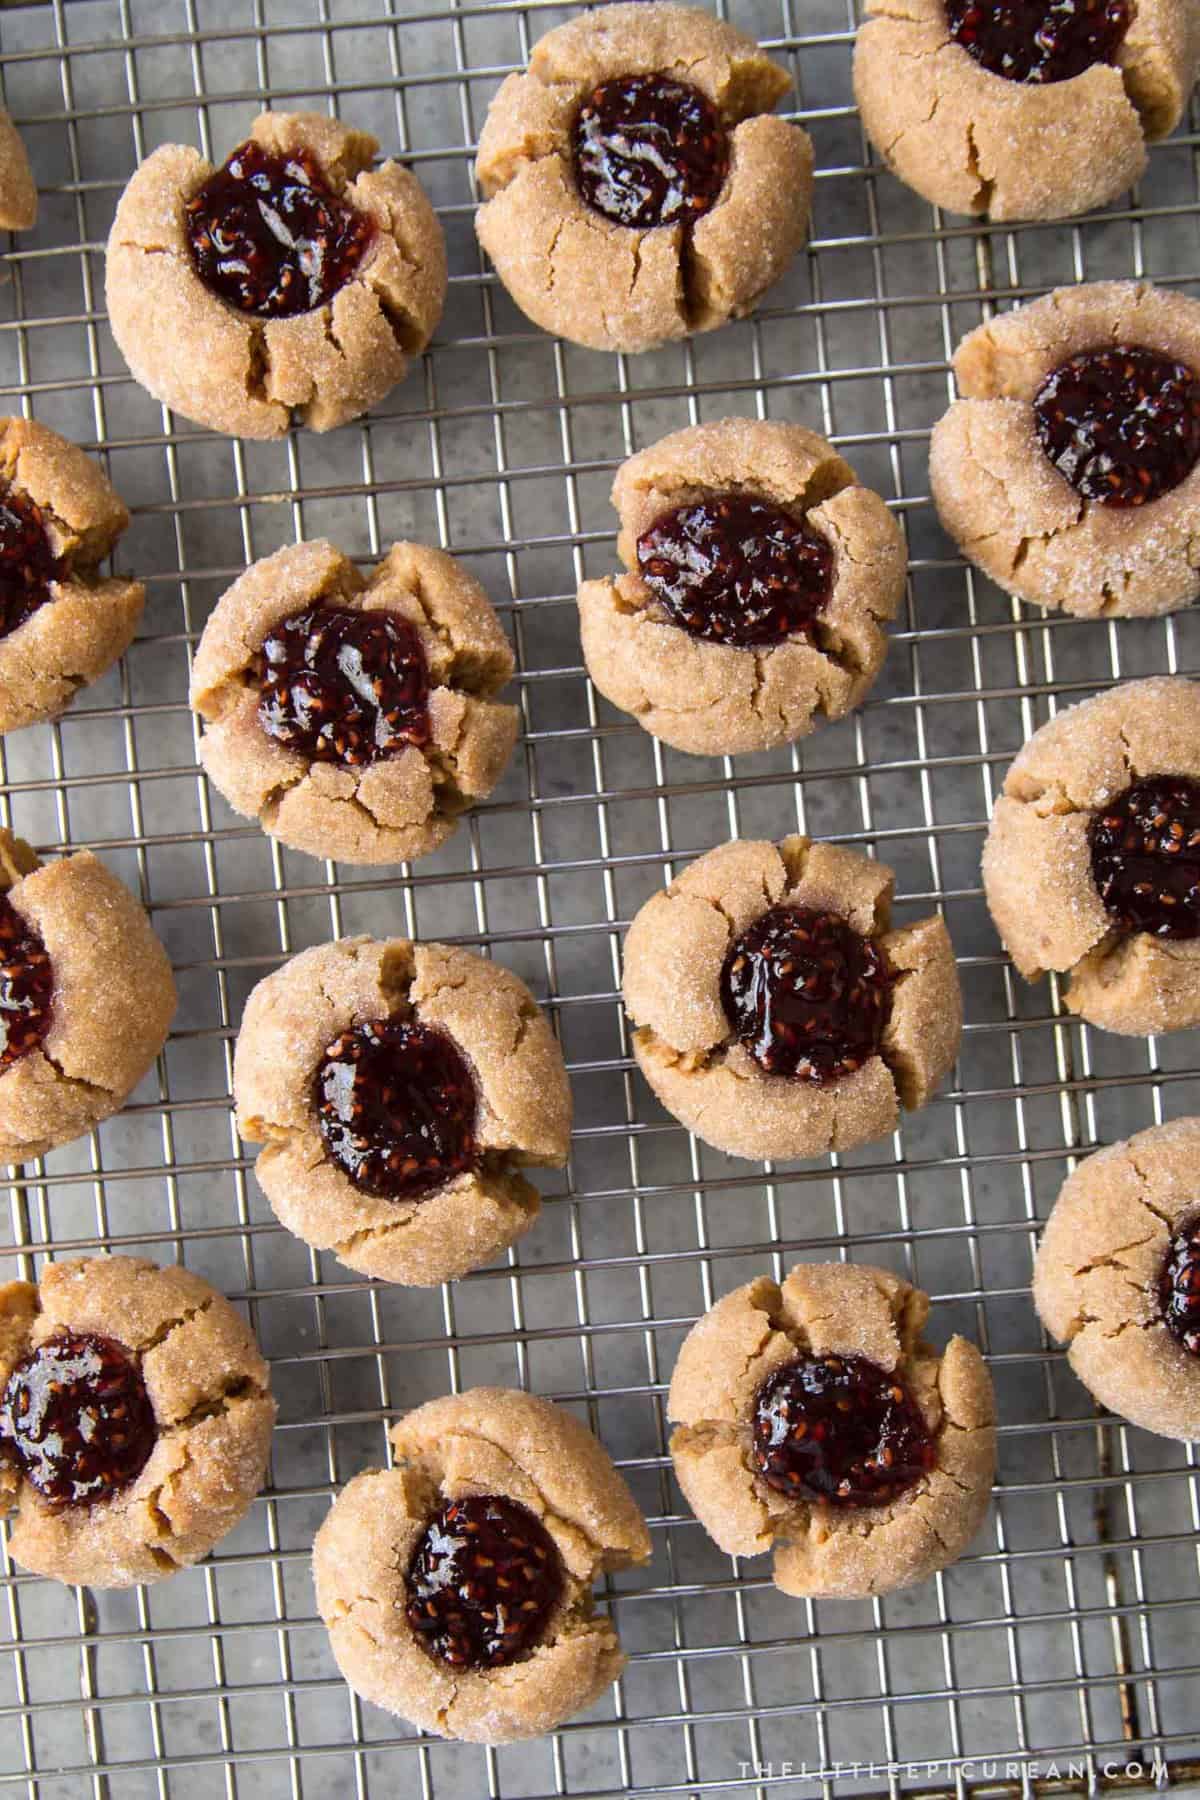
Table of Contents
Why This Recipe Works
- Professional technique, simple execution. These cookies use a mid-bake filling method that creates a perfect jam center—not too runny, not too firm. The jam heats just enough to meld with the cookie while maintaining its shape once cooled.
- The perfect texture. Brown sugar keeps these cookies soft and chewy while the granulated sugar coating adds a delicate crunch. The result? Bakery-quality cookies from your home oven.
- Stackable and giftable. Unlike thumbprints filled before or after baking, this method creates a firm jam surface that won’t smear, making them ideal for cookie tins and gift boxes.
What Are Thumbprint Cookies?
Thumbprint cookies (also called bird’s nest cookies, gem cookies, or imprint cookies) are classic treats featuring a signature indent filled with jam, chocolate, or caramel. Traditionally made with shortbread, these peanut butter thumbprint cookies offer a softer, chewier texture that pairs beautifully with fruit preserves.
This recipe combines professional pastry techniques with simple home baking—no fancy equipment required.
I have a few on the site including chocolate hazelnut thumbprint cookies and chocolate peanut butter cup cookies. This version is an ode to my favorite childhood flavors.
Ingredients
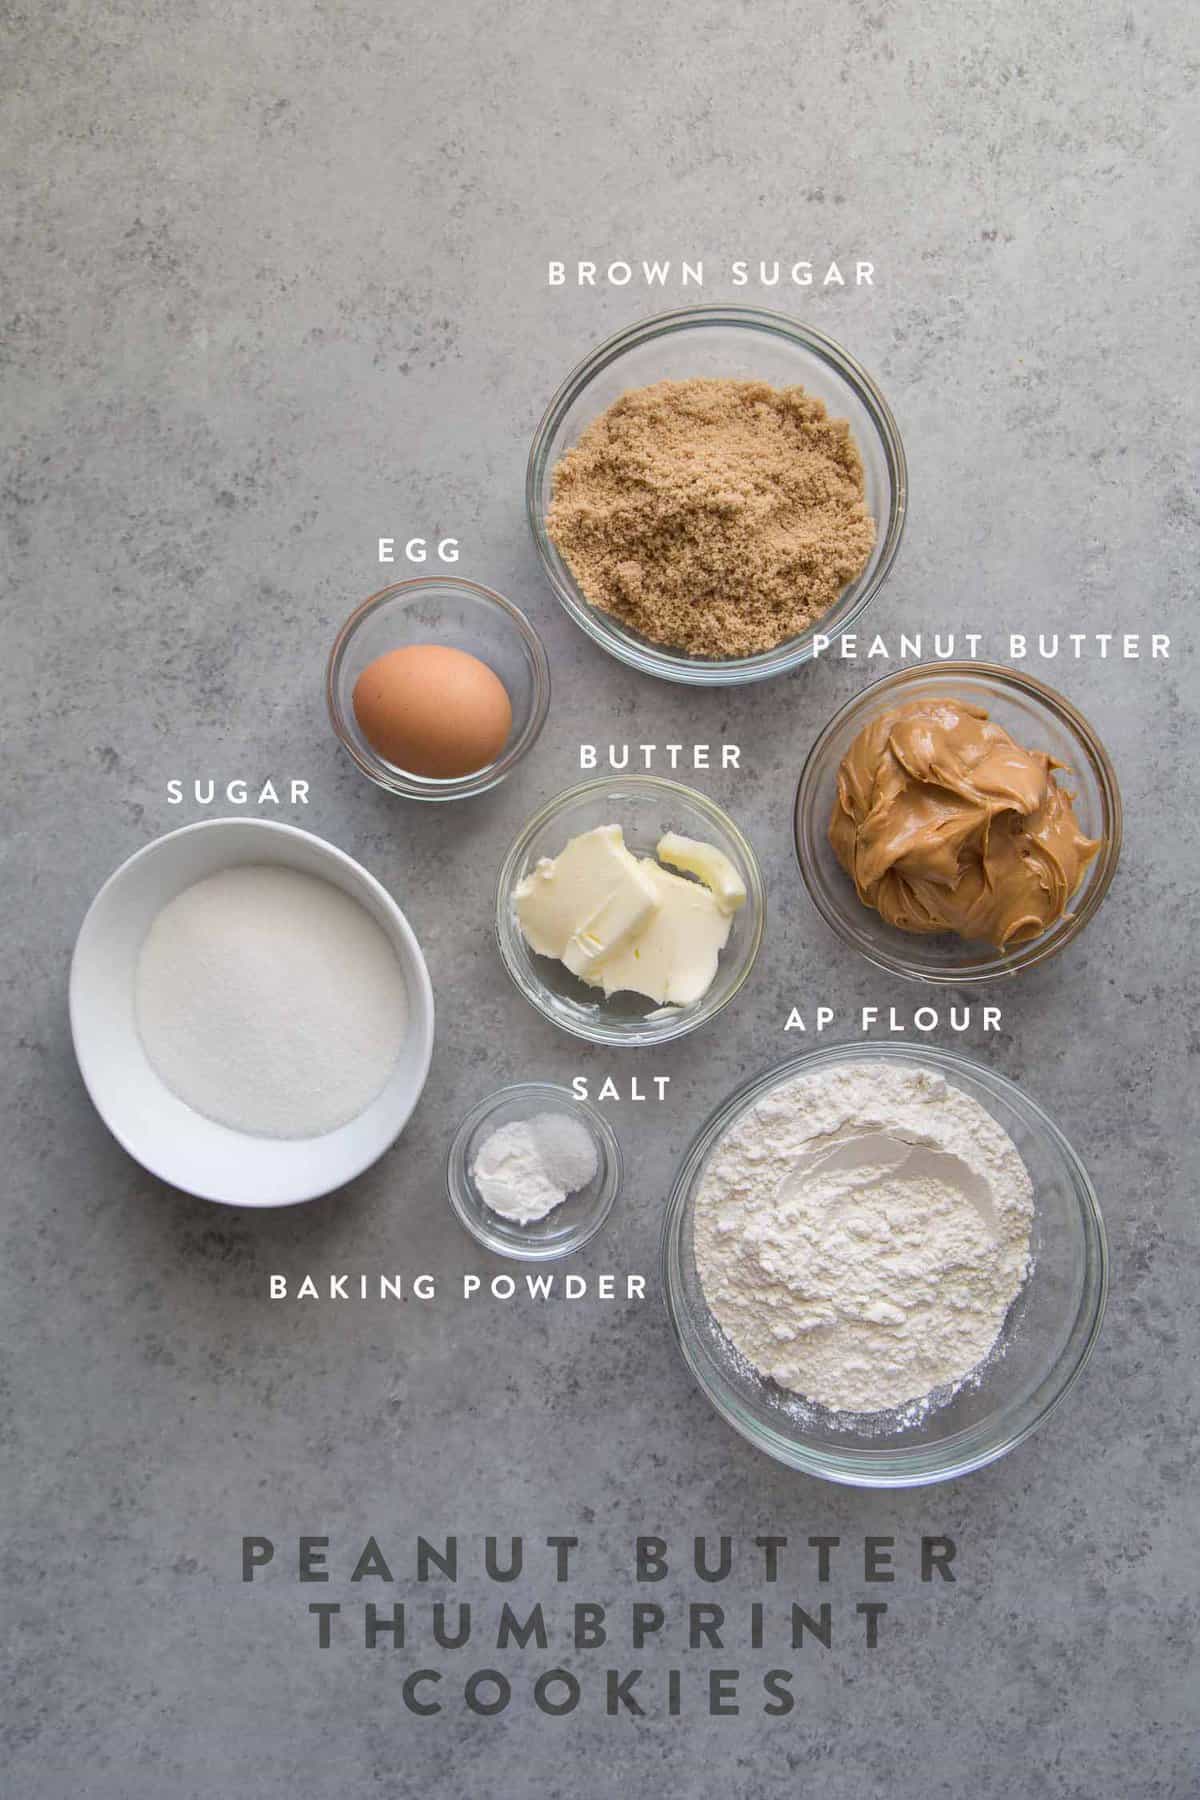
These homemade cookies are easy to make. Use a stand mixer, electric hand mixer, or simply use a spatula! Here’s what you need for the soft and chewy cookie dough:
- All-purpose flour – any brand works. I highly recommend King Arthur All-Purpose Flour.
- Baking powder – leavens the cookies, provides tenderness
- Salt – this recipe was tested using Diamond Crystal Kosher Salt. Do not use table salt.
- Unsalted butter – salted butter may be used. Decrease salt in recipe to 1/4 teaspoon.
- Creamy peanut butter – use no-stir creamy peanut butter like Skippy or Jif for best results
- Brown sugar – gives the cookies a warm sweet flavor, while also helping to add softness and moisture
- Egg -binds together the dough. While this recipe calls for a large egg, you may use medium or extra-large egg with little to no change in end result.
- Granulated sugar – for rolling
- Jam – high quality raspberry jam or preserves.
- Filling variations: Try grape, strawberry, or blackberry jam. Homemade chia berry jam is another great option. For chocolate lovers, use melted chocolate or caramel (see recipe notes).
How to Make Peanut Butter Thumbprint Cookies
Step 1: Prepare Your Workspace
Preheat oven to 350°F. Line a baking sheet with parchment paper.
Step 2: Make the Cookie Dough
Cream butter, peanut butter, and brown sugar until smooth using a hand mixer or stand mixer. Add egg and mix until fully incorporated. Add flour, baking powder, and salt, mixing until no dry streaks remain. The dough may look crumbly—use your hands to knead it into a cohesive ball.
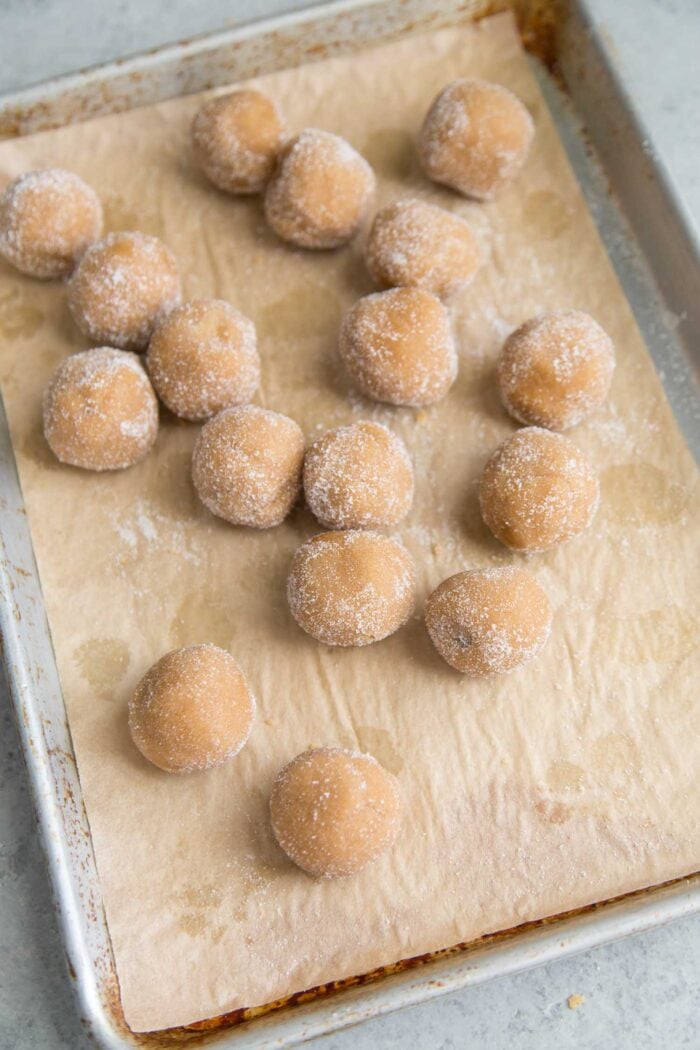
Step 3: Shape and Coat
Scoop rounded tablespoons of dough and roll into balls. Generously coat each ball in granulated sugar and place 2 inches apart on prepared baking sheet.
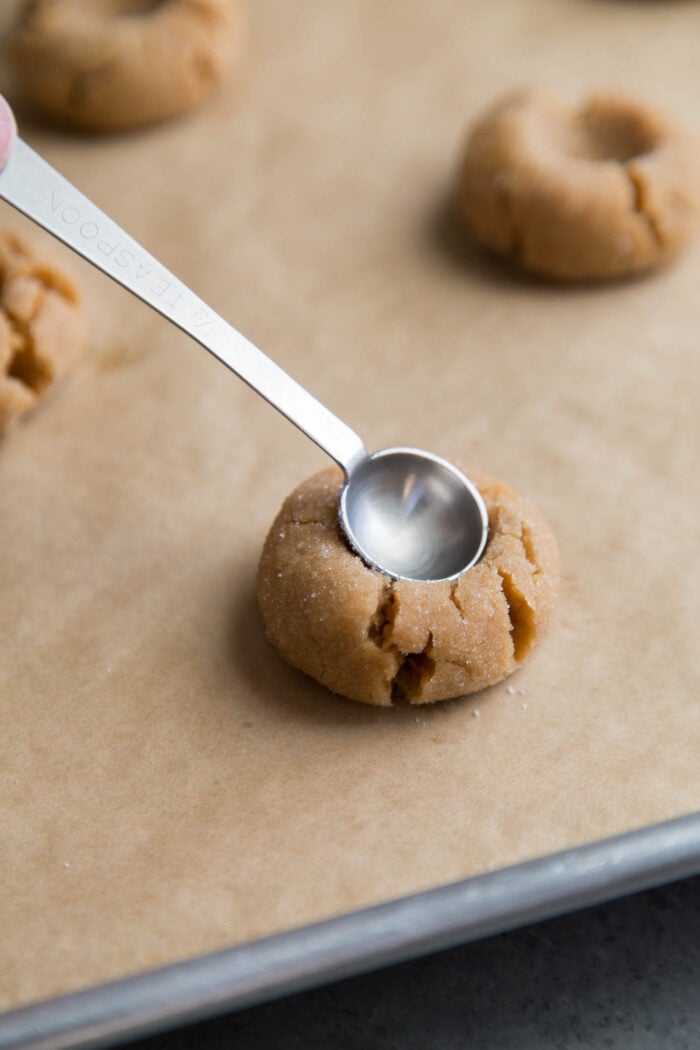
Step 4: The Mid-Bake Method (Pastry Chef Secret!)
Bake for 7 minutes, then remove from oven. Use the bottom of a ½ teaspoon measuring spoon to create a uniform indent in each cookie center. This ensures every cookie has the same sized cavity for filling.
Pro tip: Don’t worry if the edges crack slightly—this is normal and adds rustic charm!
Step 5: Fill and Finish
Spoon ½ teaspoon of raspberry jam into each indent. Return to oven and bake 8 more minutes until edges are set.
Step 6: Cool Properly
Let cookies cool on the baking sheet for 5 minutes, then transfer to a wire rack. As they cool, the jam will form a protective “skin” that prevents smearing.
Why Fill Midway Through Baking?
There are three schools of thought on filling thumbprint cookies:
- Before baking – Jam can bubble over or burn
- After baking – Jam stays cold and won’t set properly
- Mid-bake method (my preference) – The jam warms and slightly melts, creating better adhesion to the cookie while developing that signature glossy finish
The mid-bake technique is a professional pastry trick that produces bakery-quality results at home.

![]()
TIP: Create Uniform Indents
Using a measuring spoon instead of your thumb ensures consistent cavities and professional presentation.
- Use the bottom of a round 1/2 teaspoon to create the jelly cavity. Gently press the spoon into the center of the half baked cookie dough. This is will ensure that each cookie is uniform with the same amount of jelly in each serving.
- Use the same 1/2 teaspoon to portion out the thumbprint cookie filling.Each cookie gets 1/2 teaspoon of jelly
Frequently Asked Questions
Natural peanut butters (the ones that require stirring before use) do not work well in this recipe. For best results, use no-stir shelf-stable brands (like Jif or Skippy) which contain stabilizers that prevent oil separation during baking.
Unlike some cookie doughs, this mixture dries out quickly. Mix, scoop, and bake for best results.
I do not recommend freezing these cookies. The jam texture changes when frozen and defrosted.
Storage and Leftovers
Best within 2 days of baking for optimal texture. Keep at room temperature in an airtight container up to 4 days.
These peanut butter thumbprint cookies prove that childhood favorites can be elevated with proper technique. The combination of professional pastry methods and nostalgic flavors makes these cookies perfect for any occasion—from holiday cookie exchanges to casual afternoon treats.
Peanut Butter Thumbprint Cookies
Ingredients
- 3 Tablespoons unsalted butter (42 g), softened, room temp
- ½ cup smooth peanut butter (135 g)*
- ½ cup brown sugar (100 g), packed
- 1 large egg, room temp
- 1 cup all-purpose flour (130 g)
- ½ teaspoon baking powder
- ½ teaspoon kosher salt*,
- ¼ cup granulated sugar (50 g), for rolling
- 3 Tablespoon raspberry jelly, or other jelly, jam, or preserve of choice
Instructions
- Preheat oven to 350°F. Line baking sheet with parchment paper or reusable silicone baking mat. Set aside.
- In a large bowl, cream together butter, peanut butter, and brown sugar until smooth using an electric mixer. Scrape down sides as needed. Add egg and mix until well combined.
- Add flour, baking powder, and salt. Mix until no dry streaks remain. Dough will be crumbly—use hands to knead into cohesive dough.
- Portion out dough into rounded tablespoons. Form into round balls using the palms of your hands. Roll and coat with granulated sugar.
- Place sugar coated cookie balls on prepared baking sheet, spacing them about 2 inches apart.
- Bake for 7 minutes. Remove from oven. Use a ½ teaspoon measuring spoon to create indent in the center of each cookie ball. Fill cavity with ½ teaspoon of raspberry jelly. Return to oven.
- Bake 8 more minutes until edges are set and lightly golden.
- Cool on baking sheet 5 minutes, then transfer to wire rack to cool completely.
Notes
Nutrition
Nutrition information is automatically calculated, so should only be used as an approximation.
 Like this recipe? Rate & comment below!


I’m not sure what happened with this recipe but I followed the instructions and recipe to the letter and they completely melted into a greasy mess on the tray. I would not recommend this recipe at all