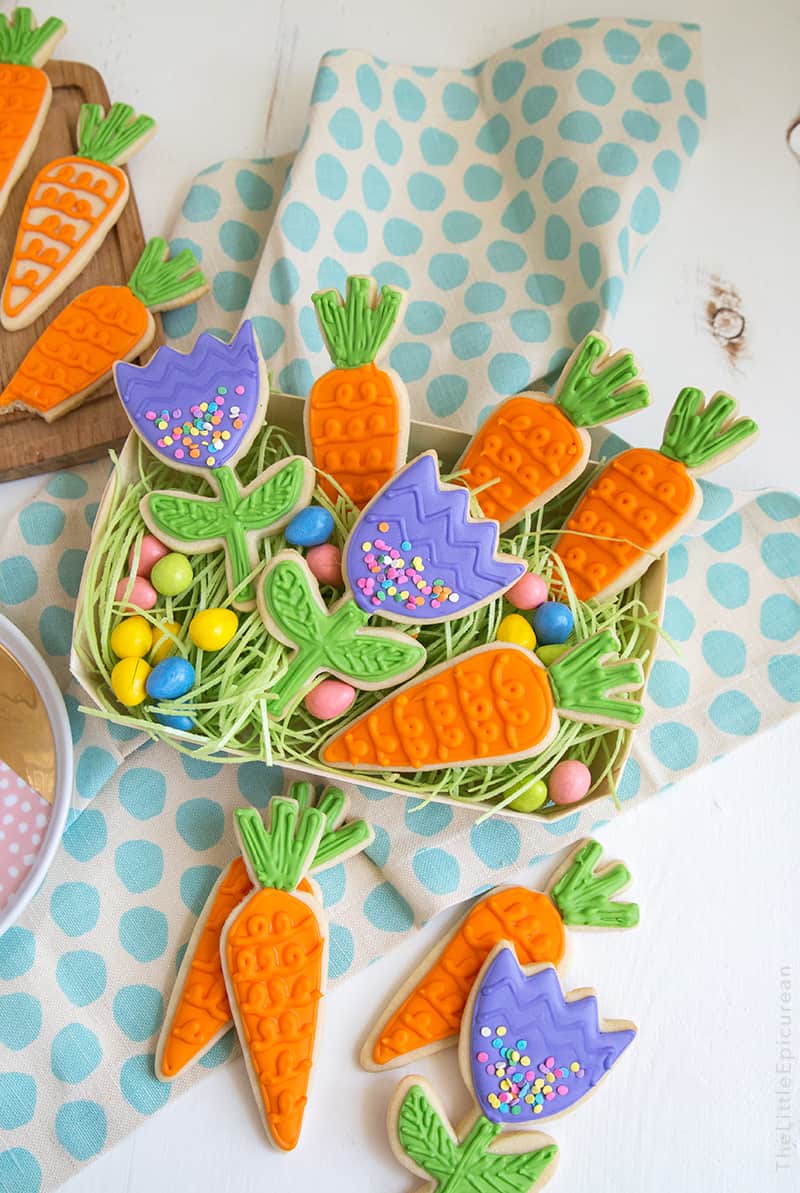
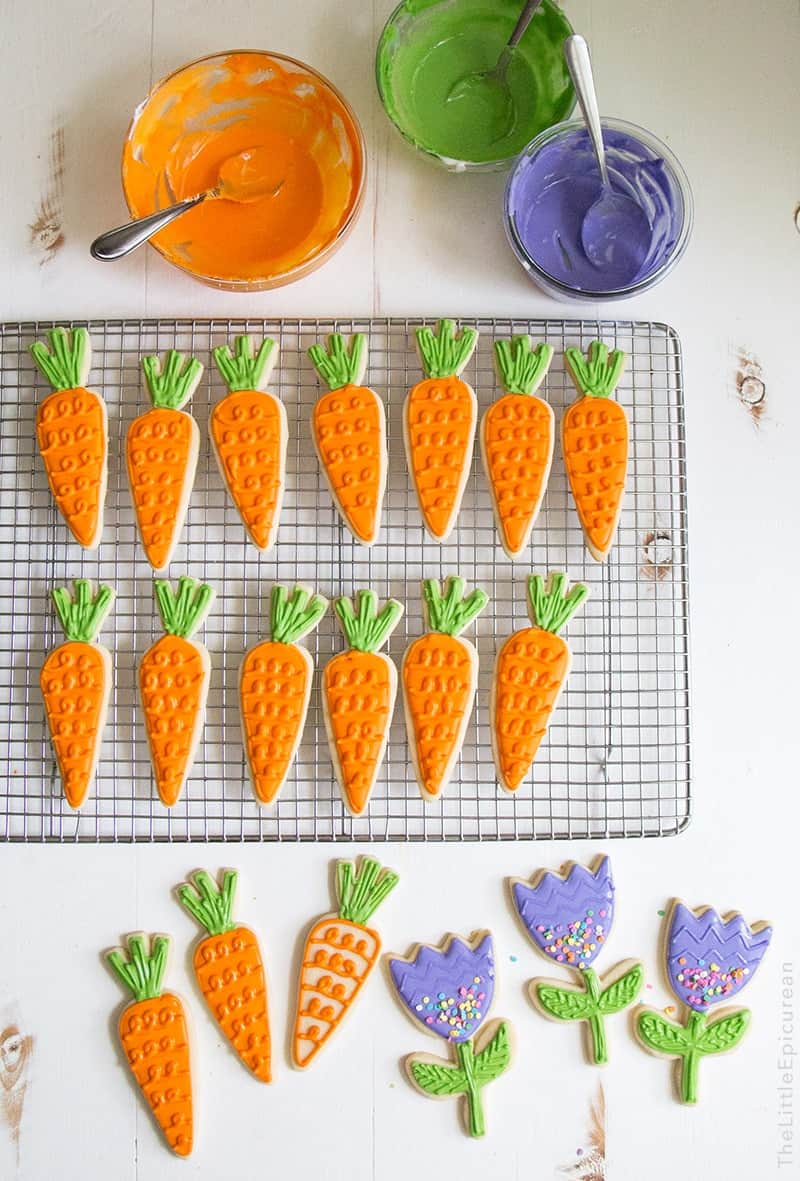
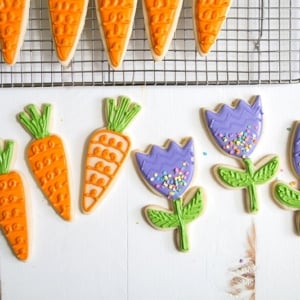
No chill sugar cookies decorated with royal icing. These spring carrot sugar cookies are perfect for Easter, but you can use this recipe all year long!
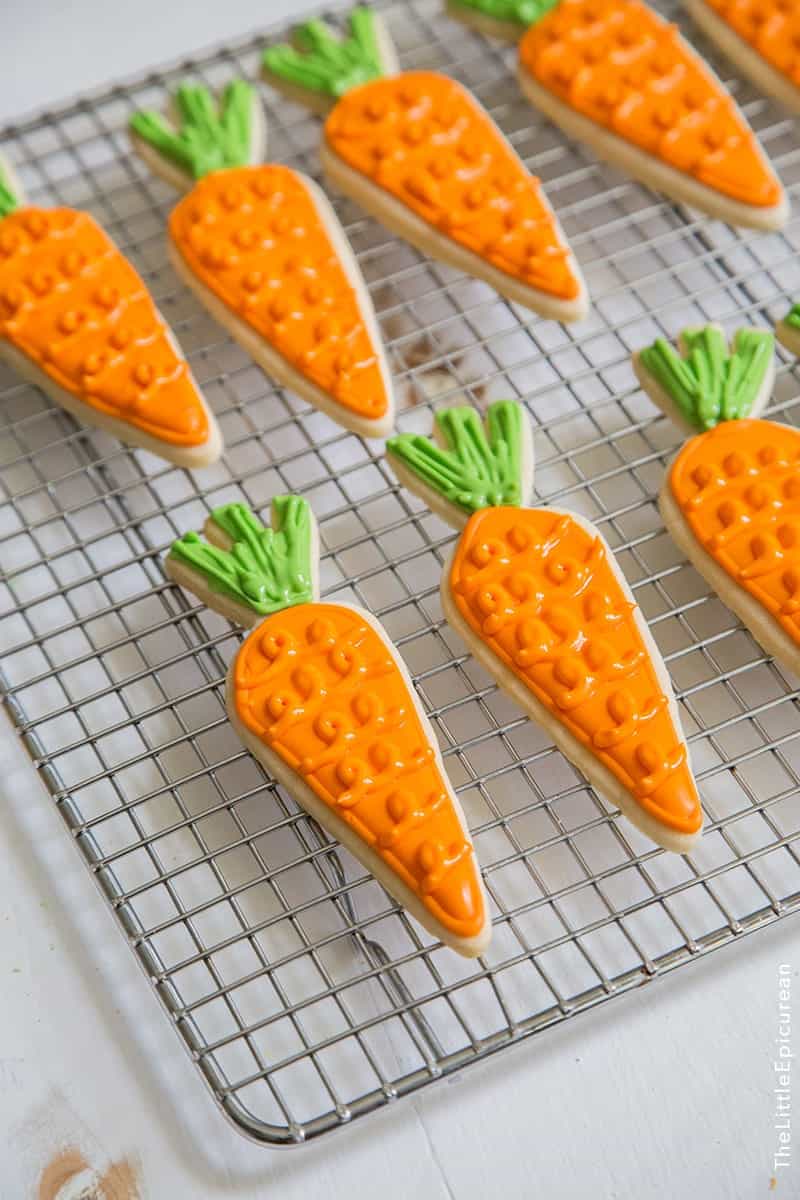
I’ve been seeing lots and lots of beautiful carrots. Carrots of all shapes, sizes, and colors. I also found the cutest Easter cookie cutter set. As a result, these spring carrot sugar cookies were born!
A fun and festive springtime cookie. This is a great activity to do with kids. Adults love it just as much!
Simply bake all the cookies ahead of time. Prepare the icing and place in piping bags. Set up a decorating station and let everyone have a creative good time!
Ingredients
There are two components: 1) sugar cookie dough and 2) royal icing.
The no chill sugar cookie dough is made with flour, baking powder, salt, butter, sugar, and egg. Choose to flavor the dough with pure vanilla extract, almond extract, lemon extract, or my favorite- pandan extract.
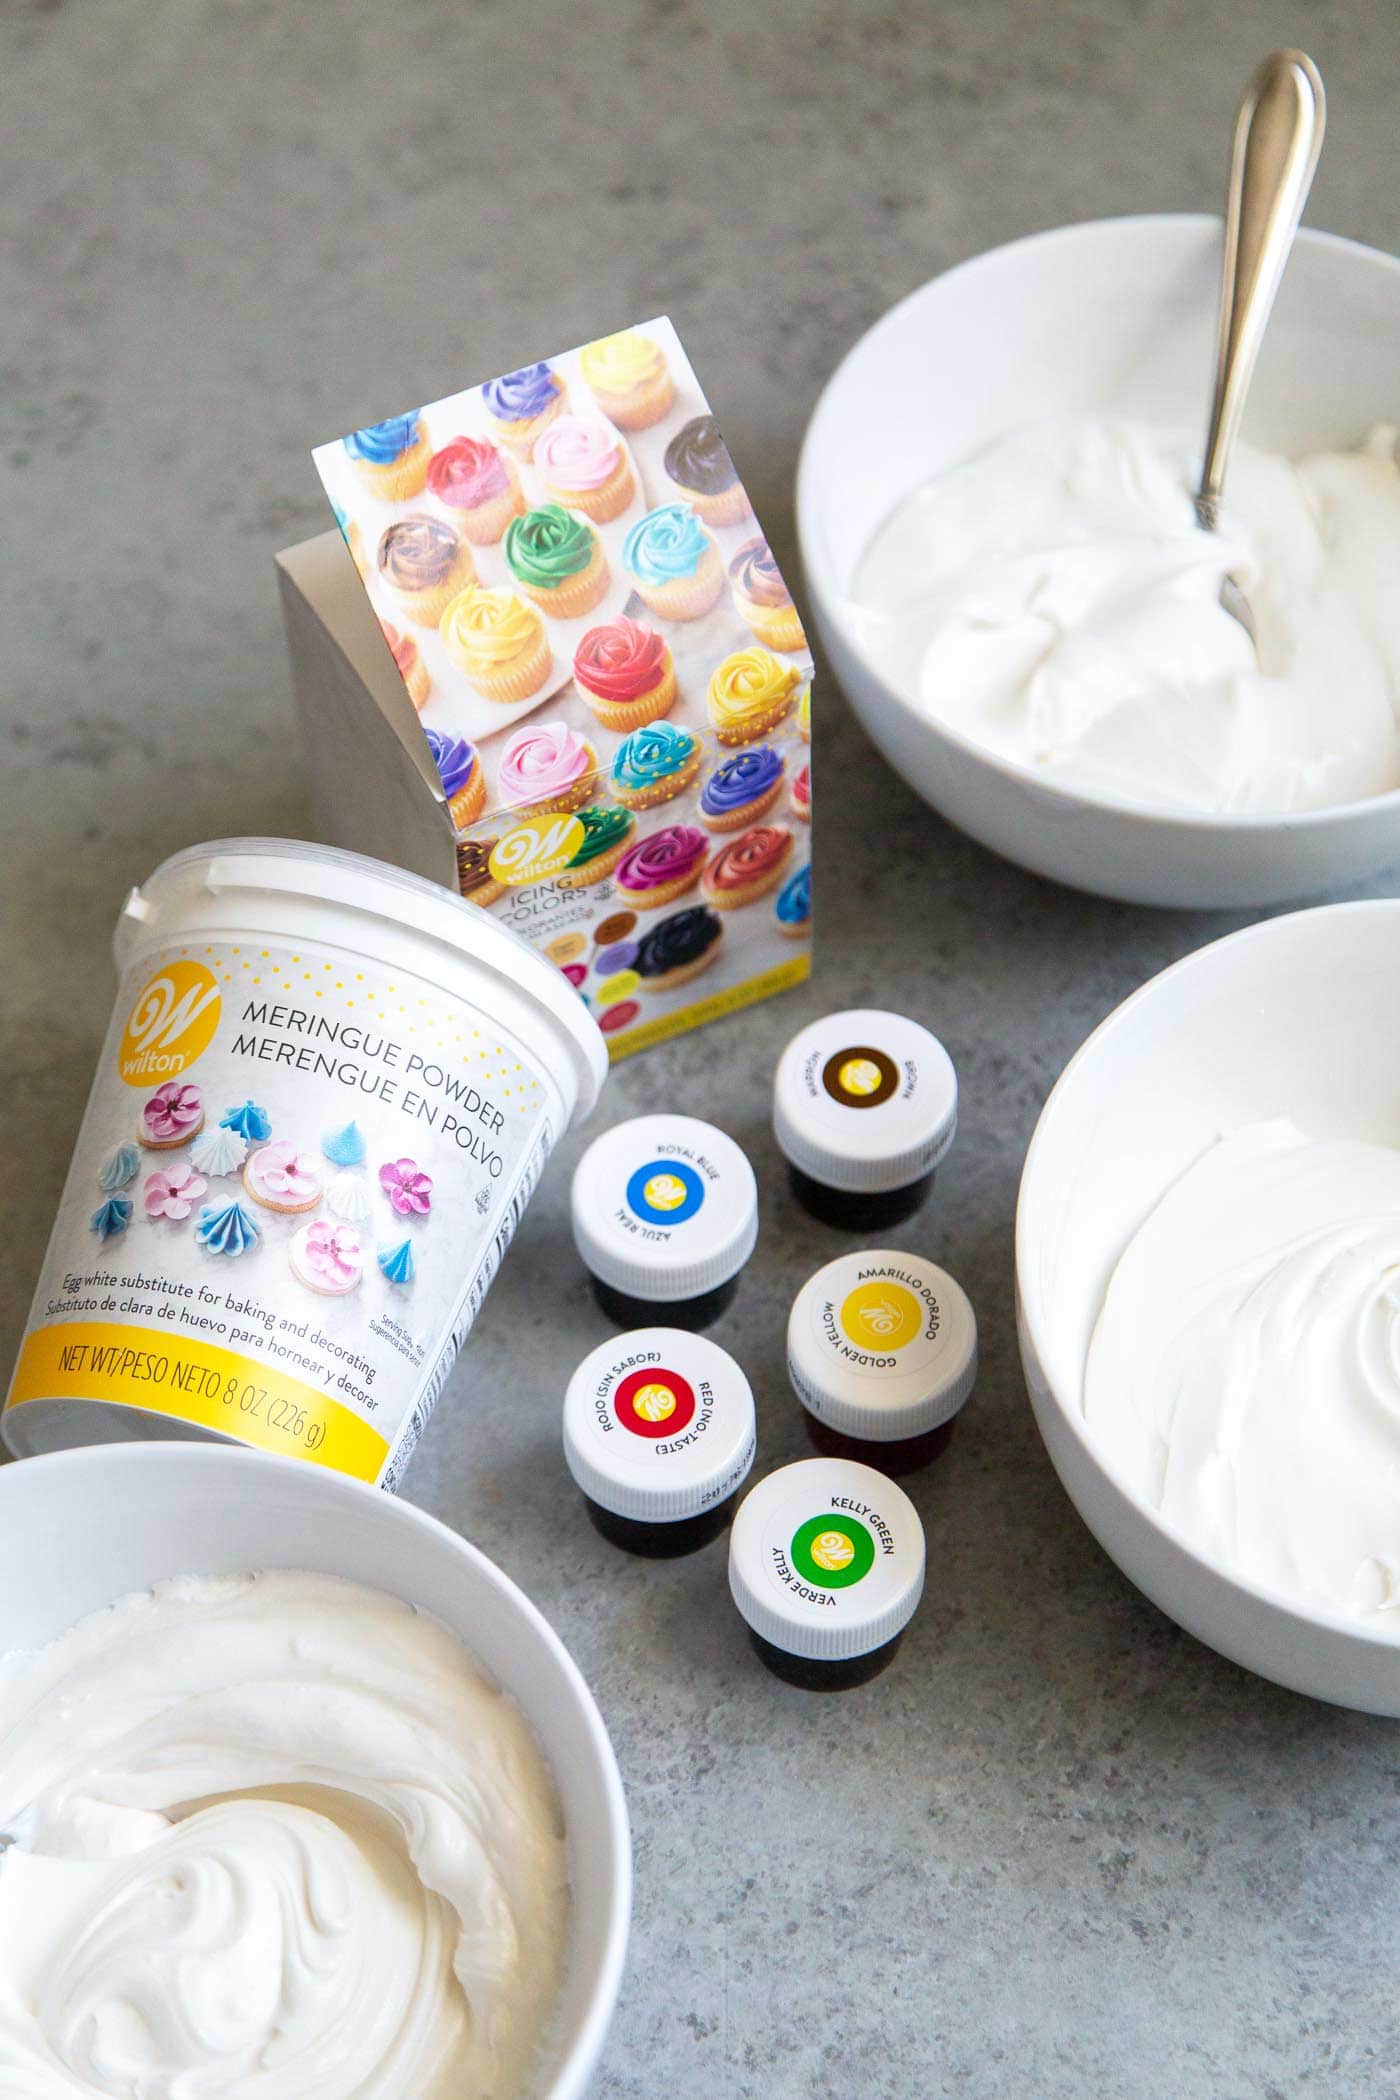
These cookies are decorated with royal icing. Royal icing is a smooth, shiny icing made typically made with confectioners’ sugar, egg whites, and acid (usually lemon juice). This version is made with meringue powder instead of egg whites.
- Meringue Powder: A mixture of dried egg whites, cornstarch, and stabilizers. It is a great alternative to using egg whites. No need to worry about salmonella risks. Plus, it’s very easy to measure out. Lots of meringue powders to choose from including: Wilton, Judee’s, and Chefmaster.
- Food Gel Colors: This type of food coloring is more concentrated than standard liquid food coloring you normally find at supermarkets. Liquid coloring has far too much moisture that will greatly affect the texture and consistency of the icing. I suggest AmeriColor Soft Gel Paste or Witon Gel Icing.
Recommended Tools and Equipment
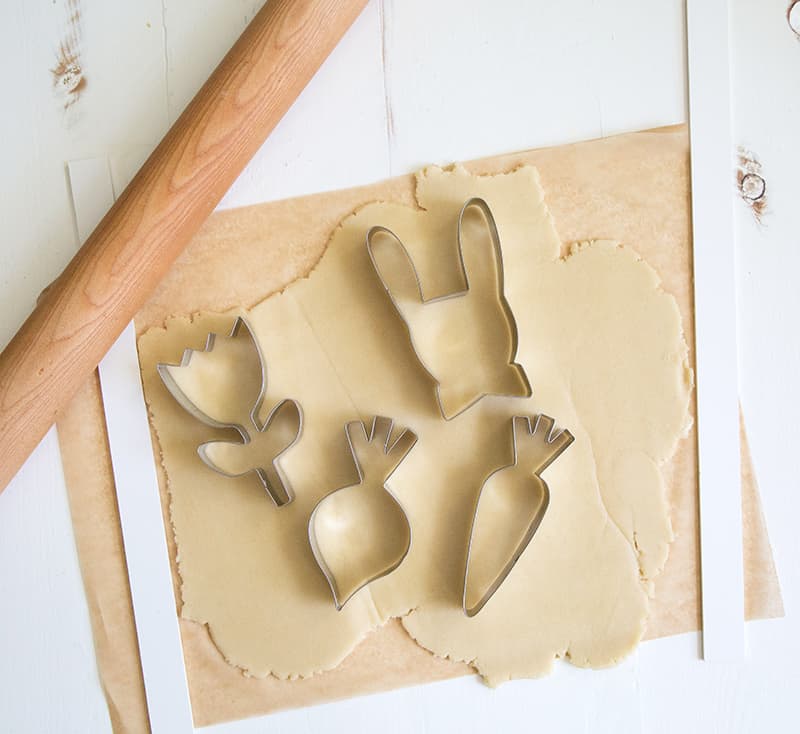
- Meri Meri Easter Cookie Cutter Set: I purchased mine in store from HomeGoods. They are also available through Amazon. Or, use your choice of cookie cutter shapes.
- Rolling Pin: Use a classic rolling pin, French rolling pin, or a stainless steel rolling pin.
- Level Sticks: Also called rolling pin guides or dough leveler strips, ensure evenly rolled out dough. They come in various thicknesses for whatever you’re rolling. Asides from cookies, they’re awesome for rolling out pie doughs. They’re my secret weapon for even consistent cookies.
- Wire Cooking Rack: Cool fresh baked cookies on wire rack. Cookies will harden and strength as they cool. Airflow from the wire rack ensures cookies do not get soggy.
- Pastry Bags: Also called piping bags. I prefer to use the disposable versions for easy clean up. It is best to use disposable piping bags for colored icings and frosting to prevent staining.
- Small Round Piping Tips: Highly recommended, but optional. Small round piping tips helps to ensure clean even icing borders. More detailed information further below.
![]()
Baking Tip
- Place similar sized and similar shaped cookie dough together on baking sheets. This will ensure even baking.
- Don’t over-bake the cookies! Bake for 6-8 minutes just until the edges of the cookies are set. The cookies will continue to “cook” on the hot baking sheet out of the oven.
- Allow fresh from the oven cookies to remain on the baking sheet for about 5-8 minutes to firm up. Then, transfer cookies to the wire rack. Cool cookies to room temperature before decorating.
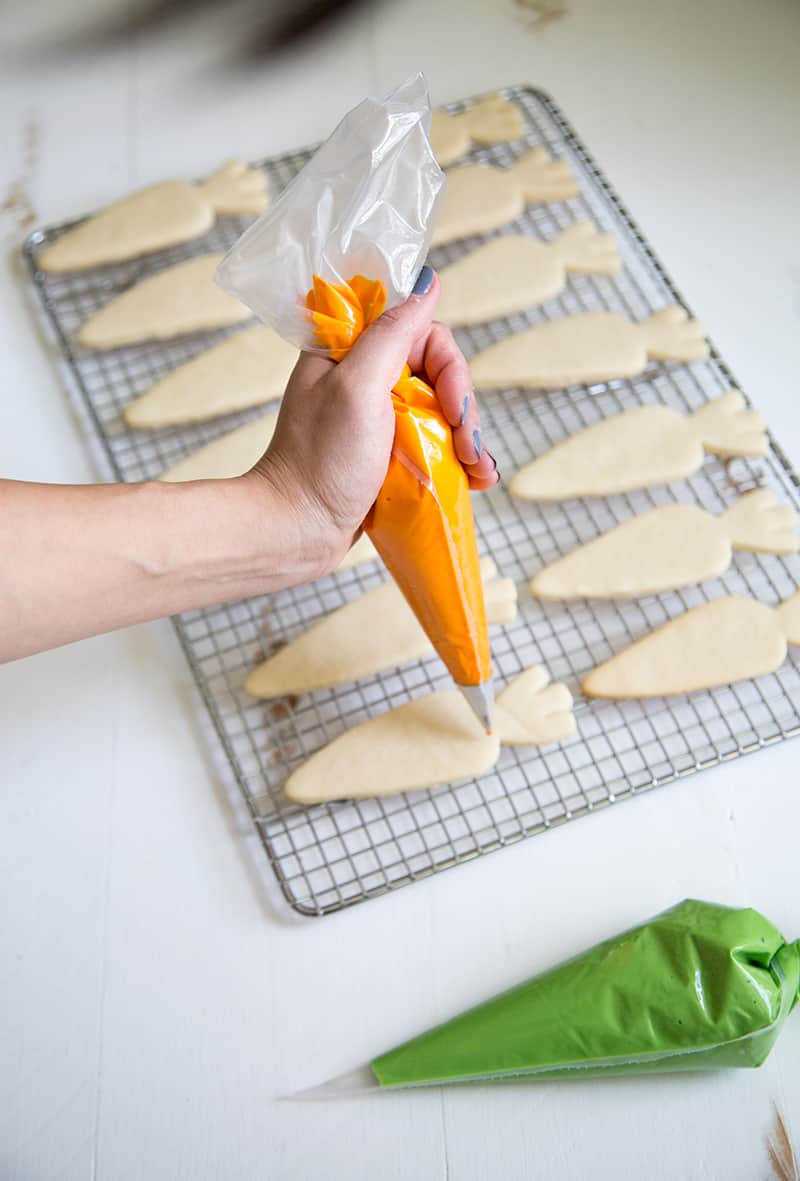
Use A Piping Bag
To get clean outlines, I use piping bags fitted with small round piping tips. I prefer to use Ateco piping tips, either size 2 or 3. Alternatively you can simply cut a small slit on the piping bag. I used both methods.
In the photo below, the orange outline for the body of the carrot was made using a piping tip. The green outline for the carrot top was made using a piping bag without a tip.
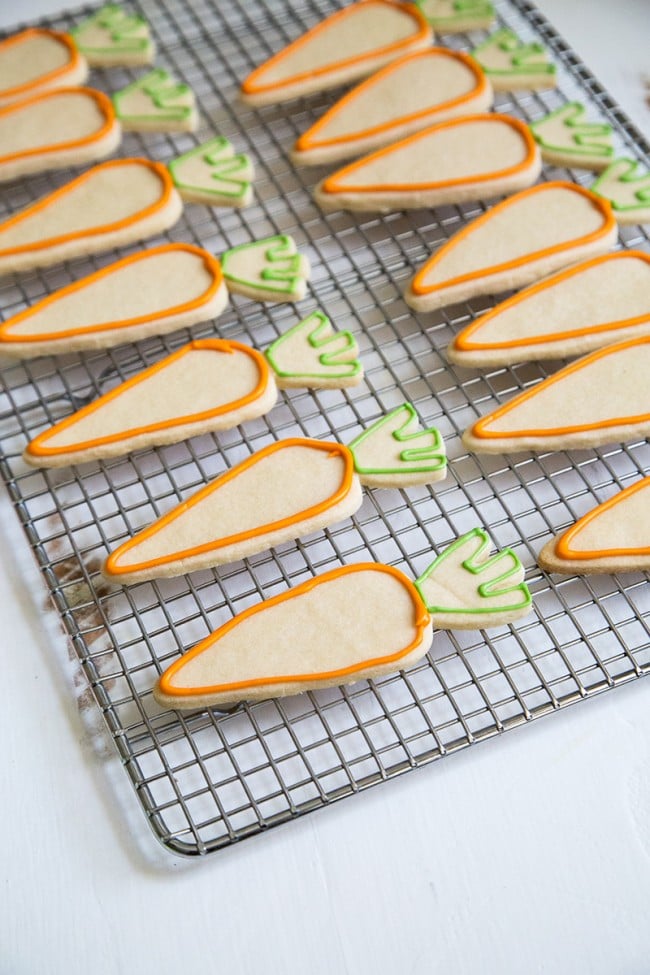
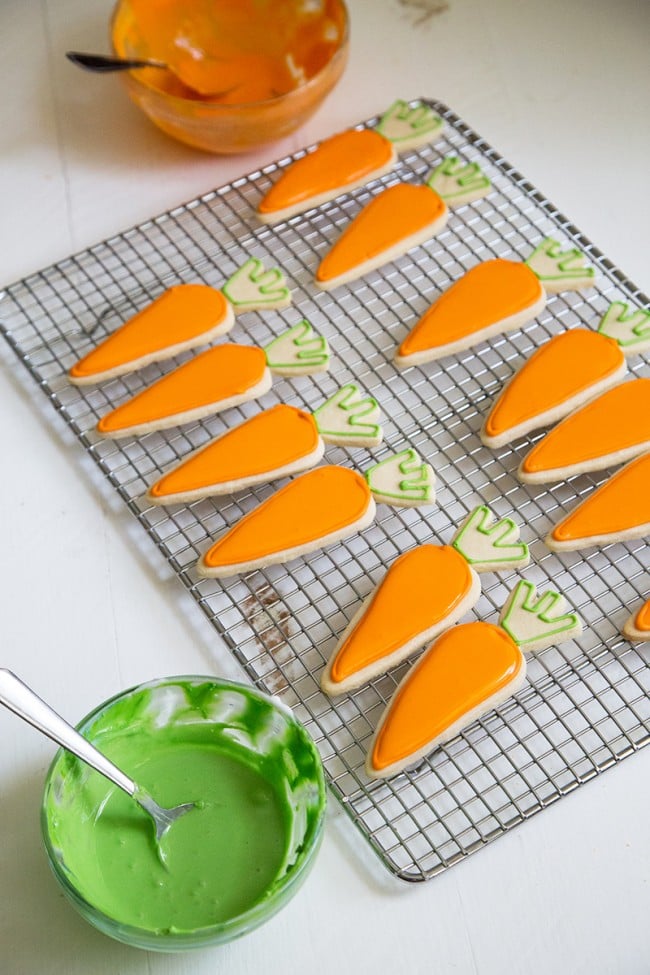
Flooding with Royal Icing Frosting
Once the royal icing outlines have set, it’s time to flood the inside with color! These are two ways to do this. You can either use a squeeze bottle or use a spoon. I hate cleaning out squeeze bottles, so I prefer to use a spoon.
You’ll need to thin out the royal icing until it’s very fluid. Add water 1/2 tsp at a time until the desired thickness is achieved.
- Pour a small amount of royal icing within the outlines.
- Use a toothpick gently guide the royal icing to the edges of the outline.
- Also use the toothpick to pop any bubbles that may form on the surface.
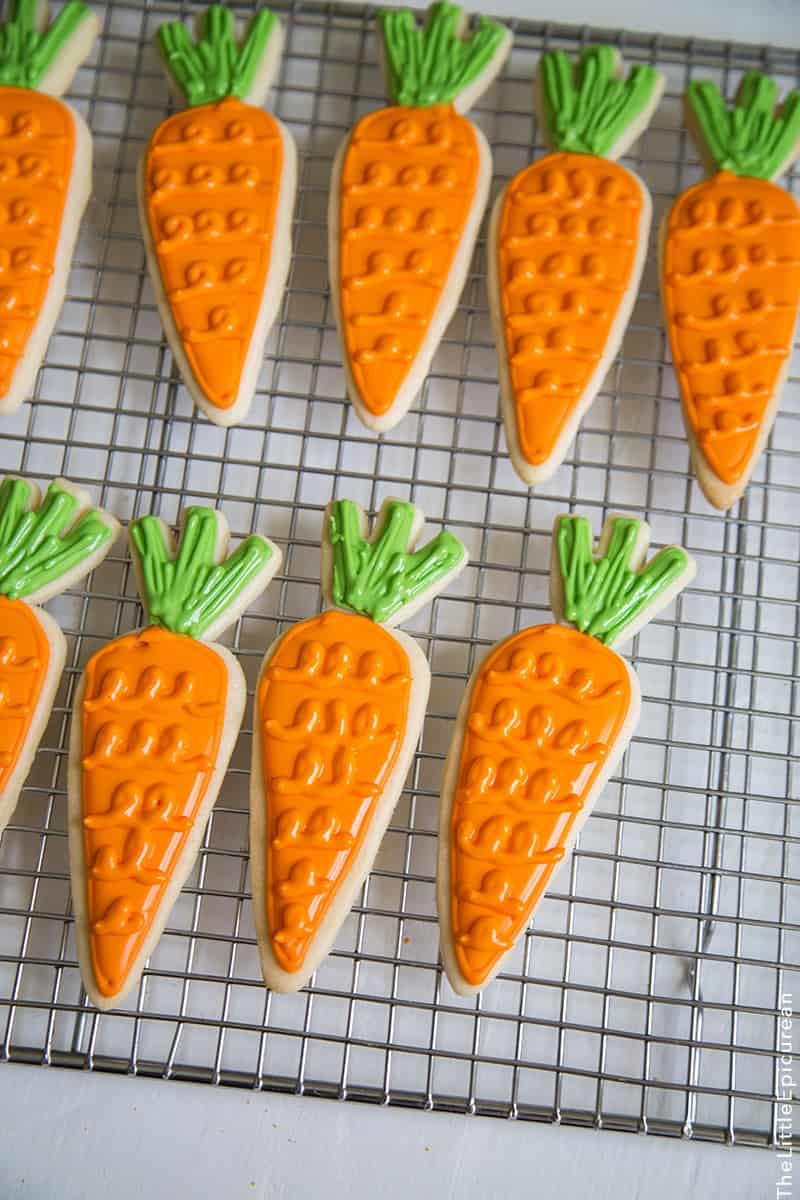
Once the flood work has set, you can pipe on the additional decorations. Once you again you have the choice of using a small round piping tip or simply cutting a small opening in the piping bag.
![]()
Helpful Royal Icing Tips
Royal icing hardens and dries quickly. It is important to keep unused royal icing covered! Cover royal icing with a damp paper towel. For extended storage, cover the damp paper towel with a lid or plastic wrap.
Other ways to prevent royal icing from hardening:
- excess royal icing can be kept in the freezer for longer storage
- store in sealed piping bags
- place in covered squeeze bottles

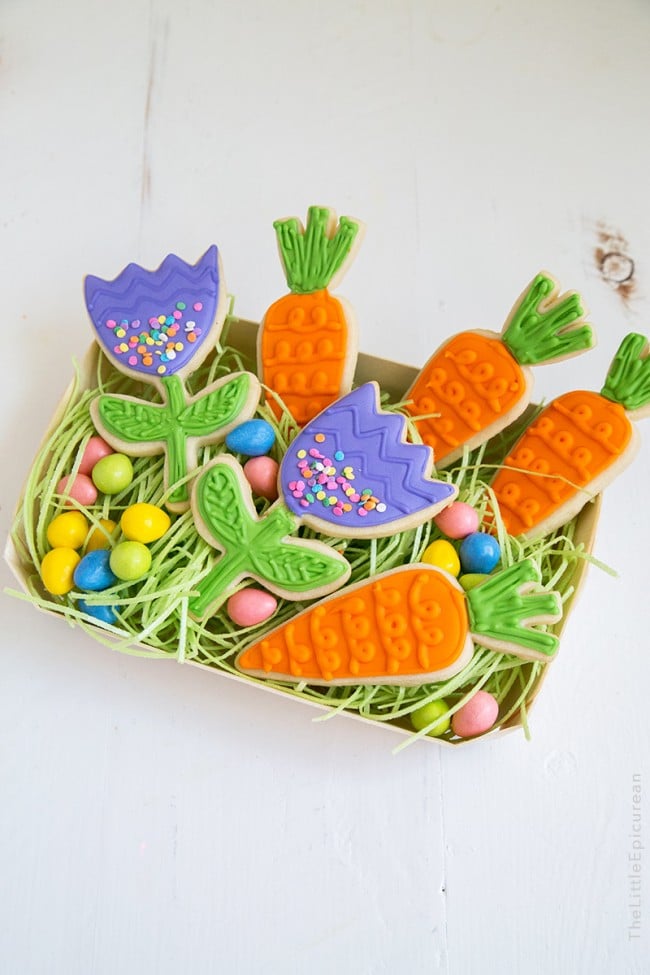
More Spring Desserts
- Easter Egg Chocolate Cake
- Carrot Cake Cinnamon Rolls
- Speckled Egg Chocolate Cake
- Carrot Cake with Brown Sugar Cream Cheese
Spring Carrot Sugar Cookies
Ingredients
Sugar Cookies:
- 3 cup all-purpose flour, (390)
- 2 teaspoon baking powder
- ¼ teaspoon kosher salt
- 1 cup unsalted butter, (226 g), softened
- 1 cup granulated sugar, (200 g)
- 1 teaspoon vanilla extract
- 1 teaspoon pandan extract*, optional
- 1 large egg
Royal Icing:
- 6 oz warm water
- 5 Tablespoons meringue powder
- 2 ¼ pounds powdered sugar
- 1 teaspoon pure vanilla extract
- gel paste colors, as needed (see notes)*
Instructions
Sugar Cookies:
- Preheat oven to 350°F. Line baking sheets with parchment paper or silpat liners. Set aside.
- In a large bowl, whisk together flour, baking powder, and salt. Set aside.
- In the bowl of a stand mixer fitted with a paddle attachment, cream butter. Once smooth, add sugar and extracts. Mix on low speed until combined. Add egg and continue to mix. Scrape down bowl as needed to ensure thorough mixing.
- Add flour in two additions. Continue mixing on low speed until dough comes together. Divide dough into two equal parts. Working with one piece of dough at time, place on a lightly floured work surface. Roll to a thickness of about ¼-inch. Stamp out desired cookie shapes. Gather scrapes and re-roll as necessary.
- Place cookie cutouts on prepared baking sheets. Bake for 6-8 minutes until the edges of the cookies are set. Allow to cool in pan for 3-5 minutes until cookies have firmed up enough to move. Transfer to wire rack to cool completely.
Royal Icing:
- In the bowl of a stand mixer, whisk together warm water and meringue powder. Let sit for 3 minutes.
- Add powdered sugar in three additions. Using a paddle attachment, mix on low speed. Add vanilla extract. Mix until icing holds a ribbonlike trail on the surface of the mixture when you raise the paddle.
- Divide icing into smaller bowls. Color one orange, one green, and one purple. (Notes on food gel colors used listed below)
- Save any remaining royal icing by covering surface of icing with a damp paper towel.
Assembly and Floodwork:
- If using piping tips, place inside piping bags (pastry bags). Partially fill piping bags with desired colors.
- Start by piping a general outline using a #2 piping tip. (#0, #1, #3 also work) By the time you have outlined all your cookies, the first outline should be dry and ready for flooding.
- Thin some royal icing using warm water. Add ½ teaspoon of water at a time to your royal icing until it is loose and pourable. Using a squeeze bottle, piping bag, or spoon, flood the inside of the outlines with the thinned out royal icing. The icing should naturally flow to the edges of the outline. If it needs a little help, you can use a clean toothpick to drag it outwards. Use a toothpick to also pop any air bubbles that may have formed on the surface. Let the royal icing dry at room temperature. This takes about 15-20 minutes (something more depending on the humidity of your room).
- Once dry, use the piping bag used for creating the outlines to pipe additional decor on top of cookie to enhance shape and texture.
- Allow to dry completely before stacking. Store at room temperature. Keeps for 3 days.
Notes
- For the orange, I used a combination electric orange, electric yellow, and a touch of super red
- For the green, I used equal parts electric green and forest green
- For the purple, I used electric purple
Nutrition
Nutrition information is automatically calculated, so should only be used as an approximation.
 Like this recipe? Rate & comment below!


Hi Maryanne, love this. Would you like to share this with the other participants in Food on Friday over at Carole’s Chatter? I have a weekly link up party – each week there is a different ingredient or theme. The current theme is Easter Food!
You can see upcoming themes in one of the pages at the top of my home page. If you would like to join in the fun please schedule a reminder for each week. The collection starts at 7am Friday New Zealand time – which might be some time Thursday your time – I do find time zones quite confusing. Hope to see you soon. Cheers, Carole
I’m such a sucker for iced sugar cookies so I’m definitely adding this to my “wish” list as I’m looking for fun spring dessert ideas. These carrot and flower cookies are adorable!
Thanks so much!
Obsessed. These are ADORABLE!